You know those moments when hunger strikes and you need something delicious now? That’s where my Quick & Fun Mini Deep Dish Crescent Roll Pizzas come in—ready in under 30 minutes and packed with all the cheesy, pepperoni goodness you crave. I first made these for my niece’s sleepover when a dozen hungry kids descended on my kitchen. Total lifesaver! They’re so easy, even the littlest helpers can join in. Just unroll, press, top, and bake—then watch them disappear. These mini pizzas are my go-to for game nights, after-school snacks, or whenever I need a quick win in the kitchen.

Ingredients for Quick & Fun Mini Deep Dish Crescent Roll Pizzas
Okay, let’s talk ingredients—because with just a handful of pantry staples, you’re minutes away from pizza perfection. I’ve made these so many times I could probably do it in my sleep, but here’s exactly what you’ll need:
- 1 can (8 oz) refrigerated crescent roll dough – that magical stuff in the tube we all secretly love (no shame!)
- 1/2 cup pizza sauce – I use my favorite jarred marinara when I’m in a hurry, but homemade works too
- 1 cup shredded mozzarella cheese – the stringier, the better in my book
- 1/4 cup pepperoni slices – or more… I won’t tell if you sneak extra
- 1/4 teaspoon dried oregano – that little sprinkle makes all the difference
- 1/4 teaspoon garlic powder – because everything’s better with garlic!
See? Nothing fancy here. Most of this is probably already in your fridge or pantry. The beauty of this recipe is how easily you can swap things out—more on that later—but trust me, this classic combo never disappoints.
How to Make Quick & Fun Mini Deep Dish Crescent Roll Pizzas
Alright, let’s get to the fun part—turning that tube of crescent dough into golden, cheesy little pizza cups! I promise it’s easier than you think. Just follow these simple steps, and you’ll be biting into melty perfection in no time.
Preparing the Dough
First things first – preheat that oven to 375°F (190°C). While it’s heating up, pop open that crescent roll tube (you know, the fun part where it scares you half to sleep every time!). Unroll the dough and separate it into triangles along the perforations. Don’t worry if they’re not perfect – my first batch looked like abstract art, and they still tasted amazing.
Now, here’s my secret: press each triangle into the cups of a standard muffin tin, making sure to really seal those seams. I press from the center outward with my fingers – it’s oddly satisfying! You want the dough to come up the sides but not overhang too much. Pro tip: A light spritz of cooking spray in the tin first makes them pop right out later.
Adding Toppings
Time to get creative! Start with about a tablespoon of pizza sauce in each cup – just enough to coat the bottom without making a soggy mess. Then comes the best part – cheese! I’m generous with the mozzarella because that melty pull is everything. Sprinkle it right over the sauce.
Now for the pepperoni – I like to tuck a couple slices into each cup. Sometimes I’ll even tear them in half so they fit better. Feeling adventurous? This is where you can go wild! Add some sautéed mushrooms, diced bell peppers, or even pineapple if that’s your jam. My kids love it when we do “make your own” topping stations.
Baking and Serving
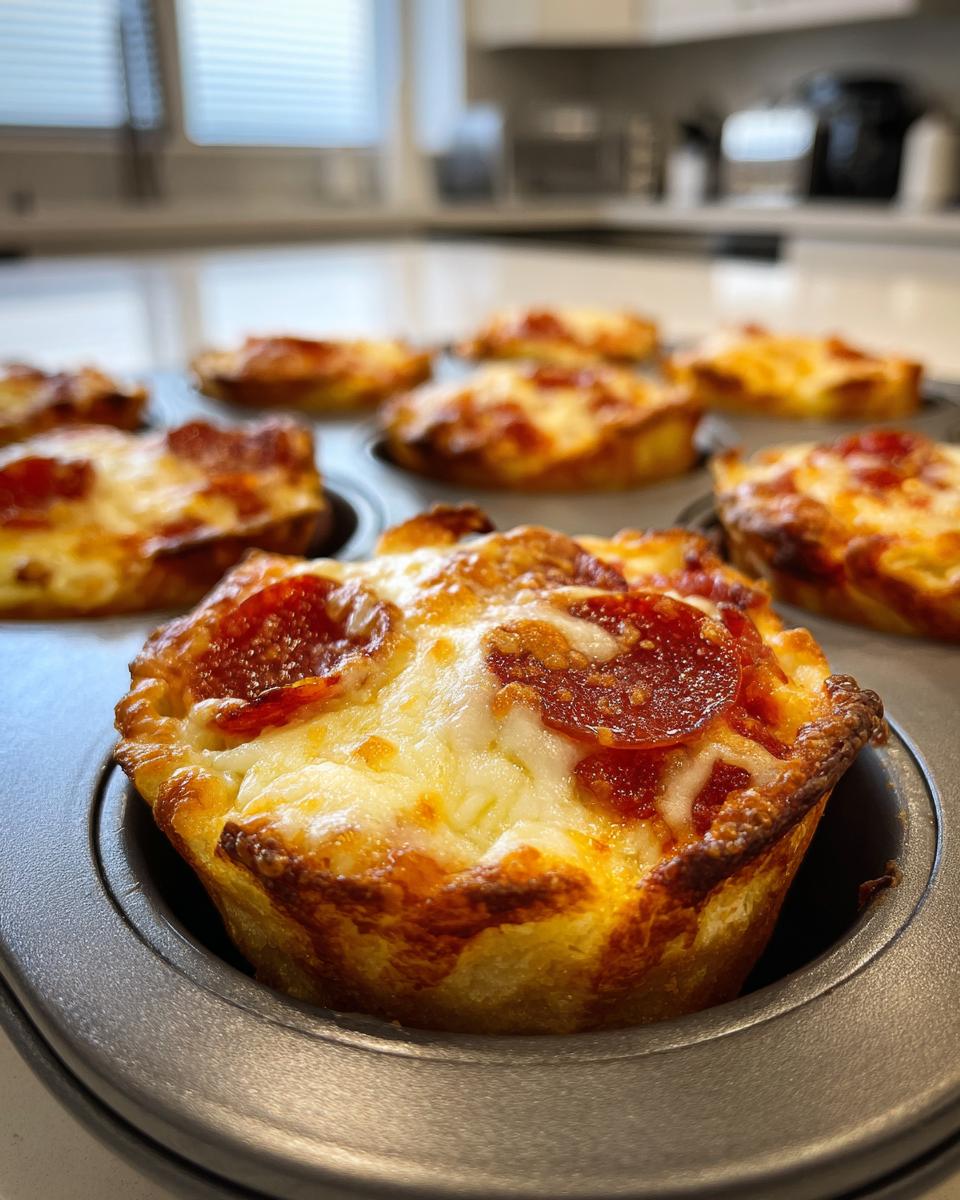
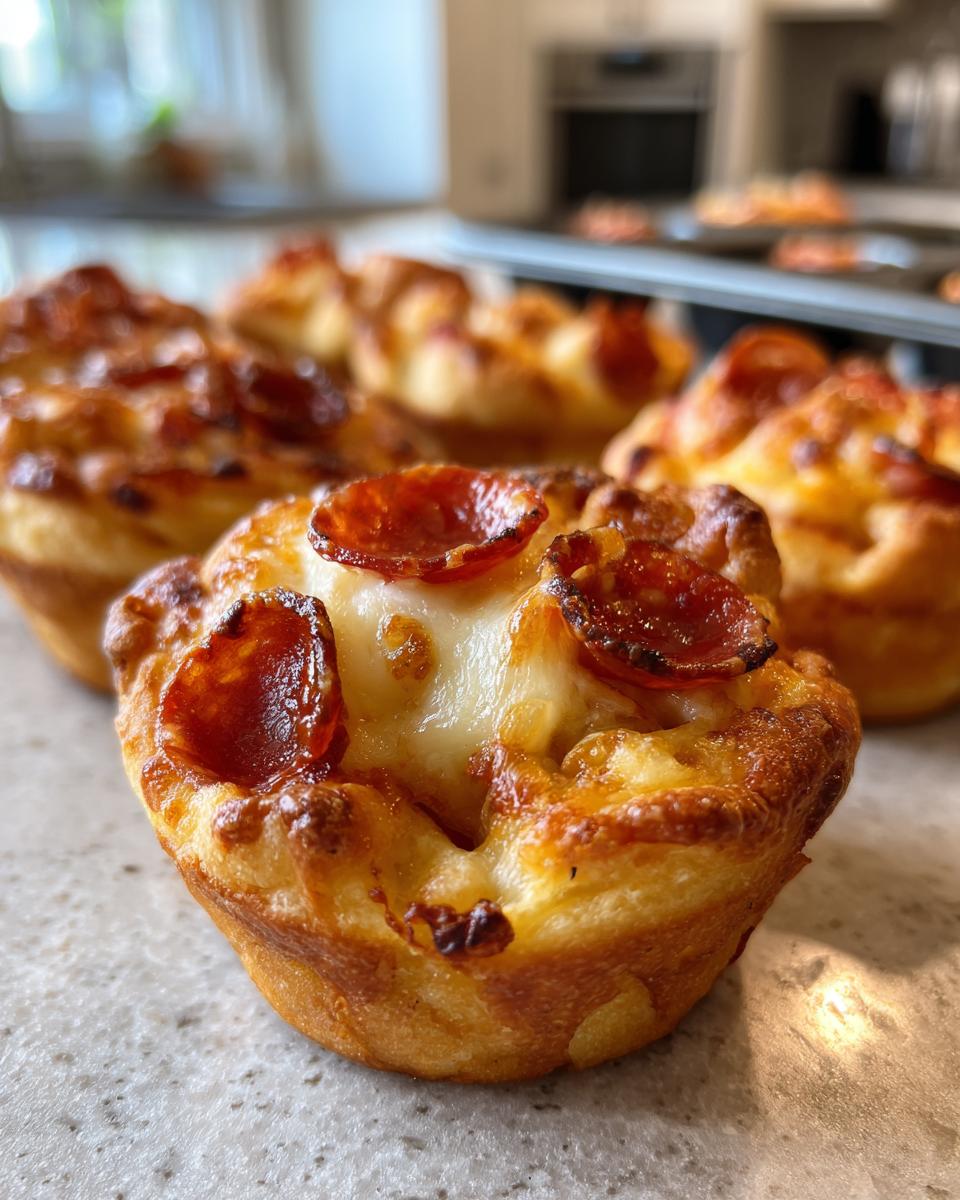
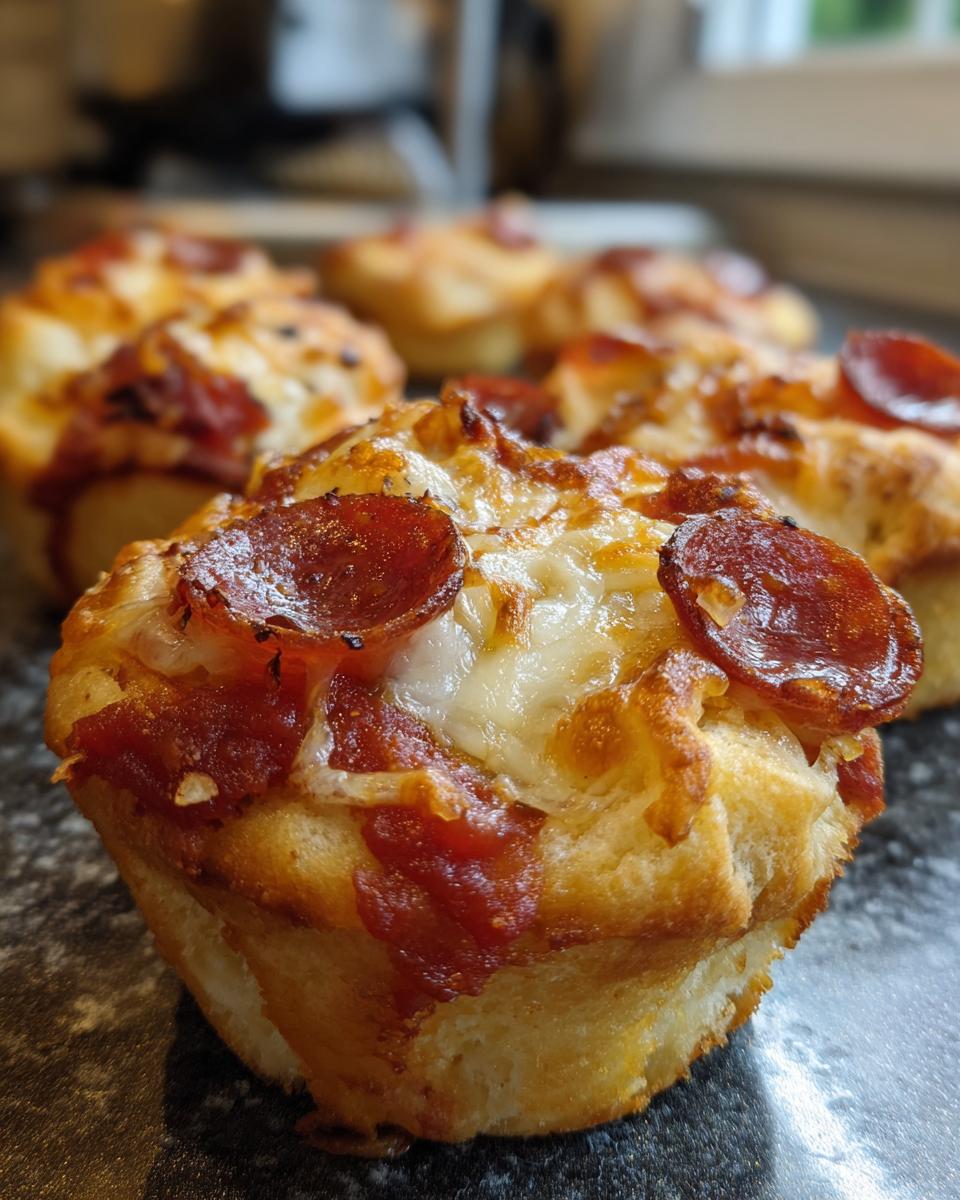
Pop those beauties in the oven for 10-12 minutes. You’ll know they’re done when the edges turn that perfect golden brown and the cheese gets all bubbly. Word to the wise – the filling is like molten lava when they first come out! I usually let them sit for 2-3 minutes before digging in.
When they’re just cool enough to handle, run a butter knife around the edges to loosen them. They should pop right out onto your serving plate. Watch out – these disappear fast! I always make extra because someone inevitably comes back for seconds (usually me).
Why You’ll Love These Mini Crescent Roll Pizzas
Listen, I know you’re going to adore these little pizza cups as much as I do—and not just because they taste incredible. Here’s why they’ve become my secret weapon in the kitchen:
- Lightning fast – From fridge to table in under 30 minutes? Yes please! When my kids come home starving after soccer practice, these save the day every time.
- Totally customizable – My son wants pepperoni, my daughter prefers just cheese, and I sneak some jalapeños on mine. Everyone gets exactly what they crave.
- Kid-approved magic – Little hands love helping press the dough and add toppings. It’s our favorite rainy day activity that ends with edible rewards!
- Party perfect – Last game night, I made three batches (one veggie, one meat-lovers, one Hawaiian) and they vanished before halftime. No plates needed—just grab and go!
- No fancy skills required – If you can open a tube of dough and sprinkle cheese, you’re already a pizza pro. My cousin who burns toast nailed these on her first try.
- Leftover superhero – That last bit of spaghetti sauce? Extra cheese nubs? Wilted veggies? They all find new life in these pizza cups. Waste not, want not!
Seriously, once you try these, you’ll start seeing crescent roll dough in a whole new light. I keep extra tubes in the fridge now—you never know when a pizza emergency might strike!
Tips for Perfect Quick & Fun Mini Deep Dish Crescent Roll Pizzas
After making these little pizza cups more times than I can count (and learning from all my messy mistakes!), I’ve picked up some game-changing tricks. Here’s how to take yours from good to “Oh my gosh, can I have the recipe?” level:
Don’t skip the parchment paper
That first time I got excited and just sprayed the muffin tin? Big mistake. Some cheese bubbled over and welded itself to the pan. Now I always line the tin with small squares of parchment paper – just press them into each cup before adding the dough. Not only does cleanup become a breeze, but the papers make adorable little handles for serving!
The Goldilocks filling rule
Too little filling and they’re sad and dry. Too much and you’ve got a volcanic cheese eruption (tasty but messy!). Aim for about 1 tablespoon of sauce per cup – just enough to coat the bottom without making the dough soggy. And when it comes to cheese, I’ve found 2 tablespoons is the sweet spot for maximum stretch without overflow.
Fresh vs. dried herbs – know your crowd
My Italian grandma would roll her eyes, but sometimes dried herbs actually work better here. Fresh basil can burn during baking, while dried oregano stands up to the heat beautifully. That said, I love adding fresh herbs after baking – a sprinkle of chopped basil or parsley makes them look fancy with zero extra effort.
The press-and-twist dough trick
After years of wonky-shaped cups, I finally figured it out: press the dough triangle into the muffin cup, then gently twist as you press upward along the sides. This helps eliminate thick dough patches that don’t cook evenly. If you see any holes, just pinch the dough together – no one will ever know!
Temperature matters
Cold dough fights you every step of the way. Let the unopened crescent roll can sit on the counter for 5-10 minutes before using. The dough becomes much more cooperative! But don’t let it get too warm or it’ll become sticky and hard to handle.
Remember – even the “mess ups” taste amazing. My first batch looked like pizza volcanoes, but my family still devoured them. That’s the beauty of these little pizza cups – they’re foolproof delicious!
Ingredient Substitutions & Variations
One of my favorite things about these mini pizza cups is how easily you can mix things up based on what’s in your fridge or dietary needs. Trust me, I’ve tried EVERY variation imaginable—here are my tried-and-true swaps that keep things exciting:
Dough alternatives
No crescent rolls? No problem! Biscuit dough from a can works beautifully—just flatten each biscuit slightly before pressing into the muffin cups. For gluten-free friends, I’ve had great success with gluten-free crescent dough (check the refrigerated section) or even using gluten-free tortillas cut into squares and pressed into the cups.
Cheese swaps
While mozzarella is classic, sometimes I shake things up with:
- Provolone for extra flavor
- Cheddar when I’m craving that nostalgic lunchable vibe
- Vegan shreds for dairy-free pals (the meltable kind works best)
- Ricotta dollops mixed with the sauce for creamy richness
Sauce adventures
Pizza sauce is just the beginning! My family goes wild when I use:
- Pesto for a herby twist
- Alfredo sauce with chicken for “white pizza” nights
- Barbecue sauce topped with shredded chicken and red onions
- Buffalo sauce when we’re feeling spicy
Topping ideas
This is where the real fun begins! Some favorite combos in our house:
- Veggie-loaded: sautéed mushrooms, bell peppers, olives
- Breakfast style: scrambled egg, sausage, and cheddar
- Taco inspired: seasoned ground beef, salsa, and Monterey Jack
- Greek vibes: feta, spinach, and kalamata olives
- Caprese: fresh mozzarella, tomato slices, and basil
The possibilities are endless—half the fun is seeing what weird combos your family comes up with! My nephew once made a “peanut butter pizza” version that… well, let’s just say some experiments are better than others.
Serving Suggestions for Quick & Fun Mini Deep Dish Crescent Roll Pizzas
Oh, the places these little pizza cups will go! I’ve served them everywhere from fancy parties to pajama movie nights—they’re basically the social butterflies of appetizers. Here’s how I love to style them up:
Game Day Glory: Arrange them on a big platter with small bowls of extra marinara, ranch, and garlic butter for dipping. They disappear faster than chips at my house! Pro tip: Use mini tongs so everyone can grab without burning fingers.
Lunchbox Love: Pack 2-3 in a thermos (they stay surprisingly warm!) with carrot sticks and grapes. My kids think it’s way cooler than a sandwich. Just let them cool completely first so they don’t steam up.
Dinner Shortcut: Serve alongside a big Caesar or garden salad when I’m too tired to cook. Three pizza cups + salad = instant happy family meal. Sometimes I’ll do half pepperoni/half veggie to please everyone.
Cocktail Party Chic: For “grown-up” gatherings, I’ll make them smaller (use a mini muffin tin!) and top with fancy toppings like prosciutto, arugula, or truffle oil. Arrange on a tiered stand with wine—instant sophistication!
Breakfast Twist: Swap the toppings for scrambled eggs, bacon, and cheddar. Dunk in maple syrup if you’re feeling wild. My husband swears this is the best hangover cure known to man.
Really though, these are perfect straight off the baking sheet while standing in the kitchen—no fancy presentation needed. Some of my best memories are of my kids and their friends crowding around the stove, burning their mouths because they just couldn’t wait!
Storing and Reheating
Okay, confession time – I rarely have leftovers of these mini pizzas to store because they disappear so fast! But on the off chance you have some stragglers (or you’re smart enough to make extra), here’s how to keep that fresh-from-the-oven magic going:
Room temp rule: Let them cool completely before storing – about 15-20 minutes. Trapped steam turns the crispy edges soggy, and nobody wants that! I spread mine out on a wire rack so air circulates all around.
Fridge friendliness: Store in an airtight container with a paper towel underneath to absorb moisture. They’ll keep for about 2 days this way. Don’t stack them more than two high or the bottoms get mushy. Learned that the hard way!
Freezer hack: Yes, you can freeze them! I flash-freeze baked pizza cups on a parchment-lined sheet first (about 1 hour), then transfer to freezer bags. They’ll keep for a month this way – perfect for emergency snack attacks!
Reheating magic: Skip the microwave unless you like rubbery dough. Instead, pop them in a 350°F oven for 5-7 minutes until warmed through. The air fryer is my secret weapon here – 3 minutes at 375°F gives them back that just-baked crispiness!
Pro tip: If you froze them unbaked (yes, this works too!), just add 2-3 minutes to the original baking time. No need to thaw – straight from freezer to oven to mouth!
Sure, they’re best fresh, but day-old pizza cups make an amazing quick breakfast when reheated with an egg cracked right into the center. Don’t judge me until you’ve tried it!
Nutritional Information
Alright, let’s talk numbers—but don’t worry, we’re keeping it real here! These nutrition facts are estimates based on using the exact ingredients I listed, but of course your mileage may vary depending on brands and how generous you are with toppings (no judgment if you went heavy on the cheese—I always do!).
Per mini pizza (that’s one crescent roll cup with all the goodies):
- 150 calories – perfect little snack size
- 8g fat (3g saturated) – thank you, delicious butter in that crescent dough!
- 15g carbs – mostly from the dough and a bit from the sauce
- 1g fiber – hey, those carrots in the sauce count, right?
- 5g protein – cheese and pepperoni doing the heavy lifting
- 320mg sodium – pretty standard for pizza-ish things
- 2g sugar – just a hint from the tomato sauce
Now, here’s the thing—this is for the basic pepperoni version. If you went wild with veggies or used turkey pepperoni, your numbers might be different. And of course, if you’re watching specific dietary needs, always check your exact ingredients. But for a quick, fun snack that satisfies pizza cravings without wrecking your day? These little guys are absolute winners in my book!
Pro tip: Pair two pizza cups with a big green salad for a surprisingly balanced lunch. The protein and carbs keep you full, while the veggies round it out. My nutritionist friend actually approved this combo—though she did raise an eyebrow at my “extra cheese” policy!
FAQ About Quick & Fun Mini Deep Dish Crescent Roll Pizzas
Over the years, I’ve gotten so many questions about these little pizza cups from friends and family (and the occasional desperate text from someone mid-recipe!). Here are the answers to everything you might be wondering:
Can I freeze these mini pizzas?
Absolutely! Two ways work great: Before baking – Assemble as usual, then freeze them right in the muffin tin. Once solid, pop them out into a freezer bag. Bake straight from frozen, adding 2-3 extra minutes. After baking – Let them cool completely, then freeze on a sheet before bagging. Reheat in the oven or air fryer for that just-baked crispness.
What are the best cheese substitutes?
While mozzarella is classic, my favorite swaps are:
- Provolone – melts beautifully with extra flavor
- Cheddar – gives that nostalgic lunchable vibe
- Vegan shreds – the meltable kind works surprisingly well
- Ricotta dollops mixed with the sauce for creaminess
Just avoid super hard cheeses that don’t melt well.
Can I make them ahead of time?
Yes! You’ve got options:
- Refrigerate assembled – Cover the muffin tin with plastic wrap and keep in fridge up to 12 hours before baking
- Prep ingredients separately – Shred cheese, chop toppings, and store in containers to assemble last minute
- Par-bake – Bake just until set (about 8 minutes), then finish baking when ready to serve
Perfect for when you’re hosting and want to minimize kitchen time!
Why did my pizza cups stick to the pan?
Oh honey, we’ve all been there! Usually it’s because:
- The pan wasn’t greased well enough (I swear by that parchment paper trick!)
- They were underbaked – golden brown edges mean they’ll release easier
- You tried to remove them too soon – let them rest 2-3 minutes first
If they do stick, don’t panic! Slide a butter knife gently around the edges to loosen.
Can kids help make these?
Are you kidding? This is the perfect first cooking project! My niece (age 4) can:
- Press dough into the cups (with help)
- Sprinkle cheese (though half ends up on the floor)
- Place pepperoni (she makes smiley faces)
Just watch those little fingers near the hot oven!
Try this recipe and share your twist in the comments! I’m always looking for new topping ideas to surprise my family with.
Print13-Minute Quick & Fun Mini Deep Dish Crescent Roll Pizzas You’ll Crave

Make these quick and fun mini deep dish crescent roll pizzas for a delicious snack or appetizer. They’re easy to prepare and perfect for sharing.
- Prep Time: 10 minutes
- Cook Time: 12 minutes
- Total Time: 22 minutes
- Yield: 8 mini pizzas 1x
- Category: Appetizer
- Method: Baking
- Cuisine: Italian-American
- Diet: Vegetarian
Ingredients
- 1 can (8 oz) refrigerated crescent roll dough
- 1/2 cup pizza sauce
- 1 cup shredded mozzarella cheese
- 1/4 cup pepperoni slices
- 1/4 teaspoon dried oregano
- 1/4 teaspoon garlic powder
Instructions
- Preheat oven to 375°F (190°C).
- Unroll the crescent dough and separate into triangles.
- Press each triangle into a muffin tin, forming a cup.
- Add 1 tablespoon pizza sauce to each cup.
- Sprinkle cheese and top with pepperoni.
- Bake for 10-12 minutes until golden brown.
- Let cool slightly before serving.
Notes
- Customize toppings with your favorite ingredients.
- Use parchment paper for easy cleanup.
- Serve warm for best flavor.
Nutrition
- Serving Size: 1 mini pizza
- Calories: 150
- Sugar: 2g
- Sodium: 320mg
- Fat: 8g
- Saturated Fat: 3g
- Unsaturated Fat: 4g
- Trans Fat: 0g
- Carbohydrates: 15g
- Fiber: 1g
- Protein: 5g
- Cholesterol: 10mg


