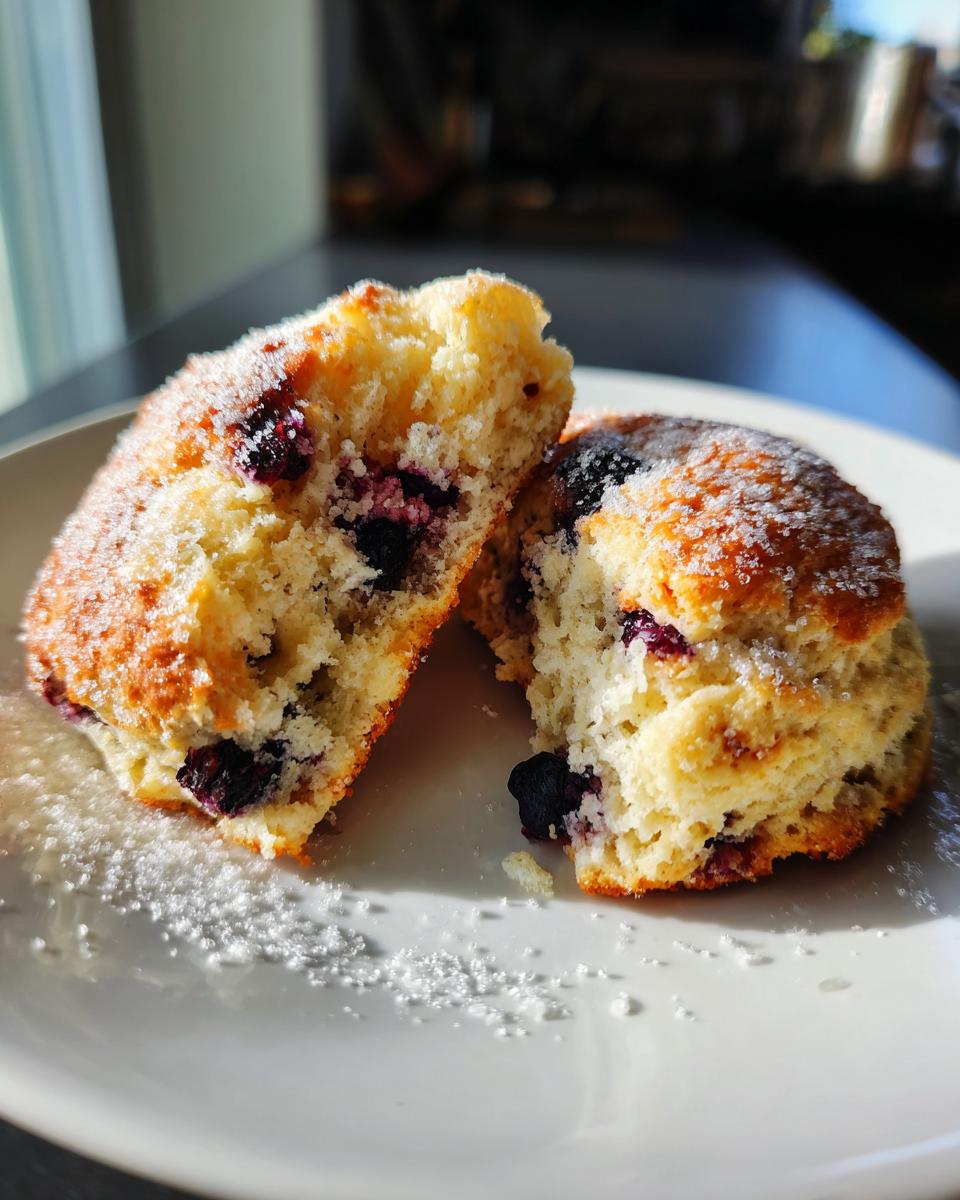
There’s something magical about waking up to the smell of freshly baked moist gluten-free blueberry scones on a lazy Sunday morning. I started making these years ago when my niece (who’s gluten-sensitive) visited—now it’s our weekend ritual. What I love most? In just 35 minutes, you get golden, flaky scones packed with juicy blueberries that somehow stay perfectly moist even without gluten. Trust me, nobody will guess these are gluten-free when they bite into that tender crumb. The secret? Cold butter and a gentle hand—just like my grandma taught me with her classic recipes. These scones disappear fast at our house, especially when served warm with a dollop of jam.
Why You’ll Love These Moist Gluten-Free Blueberry Scones
Let me tell you why these moist gluten-free blueberry scones have become my go-to breakfast treat—and why they’ll steal your heart too!
- Flaky, tender crumb without gluten: That perfect scone texture? We nailed it. The cold butter creates little pockets of flakiness, while the gluten-free flour blend keeps them light as air. No weird chewiness or dryness—just pure comfort in every bite.
- Bursting with juicy blueberries: I wait all year for blueberry season just to make these. Each scone gets loaded with plump berries that burst with sweetness when baked. (Pro tip: Toss them in a spoonful of flour first—it stops them from sinking to the bottom!)
- Ready in under 40 minutes: From bowl to table faster than a coffee run! The dough comes together in minutes, and while they bake, you’ve got time to brew that perfect cup of tea. Weekday breakfasts just got way more special.
Honestly? The best part is watching people’s faces when they realize these are gluten-free. That “wait…really?” moment gets me every time!
Ingredients for Moist Gluten-Free Blueberry Scones
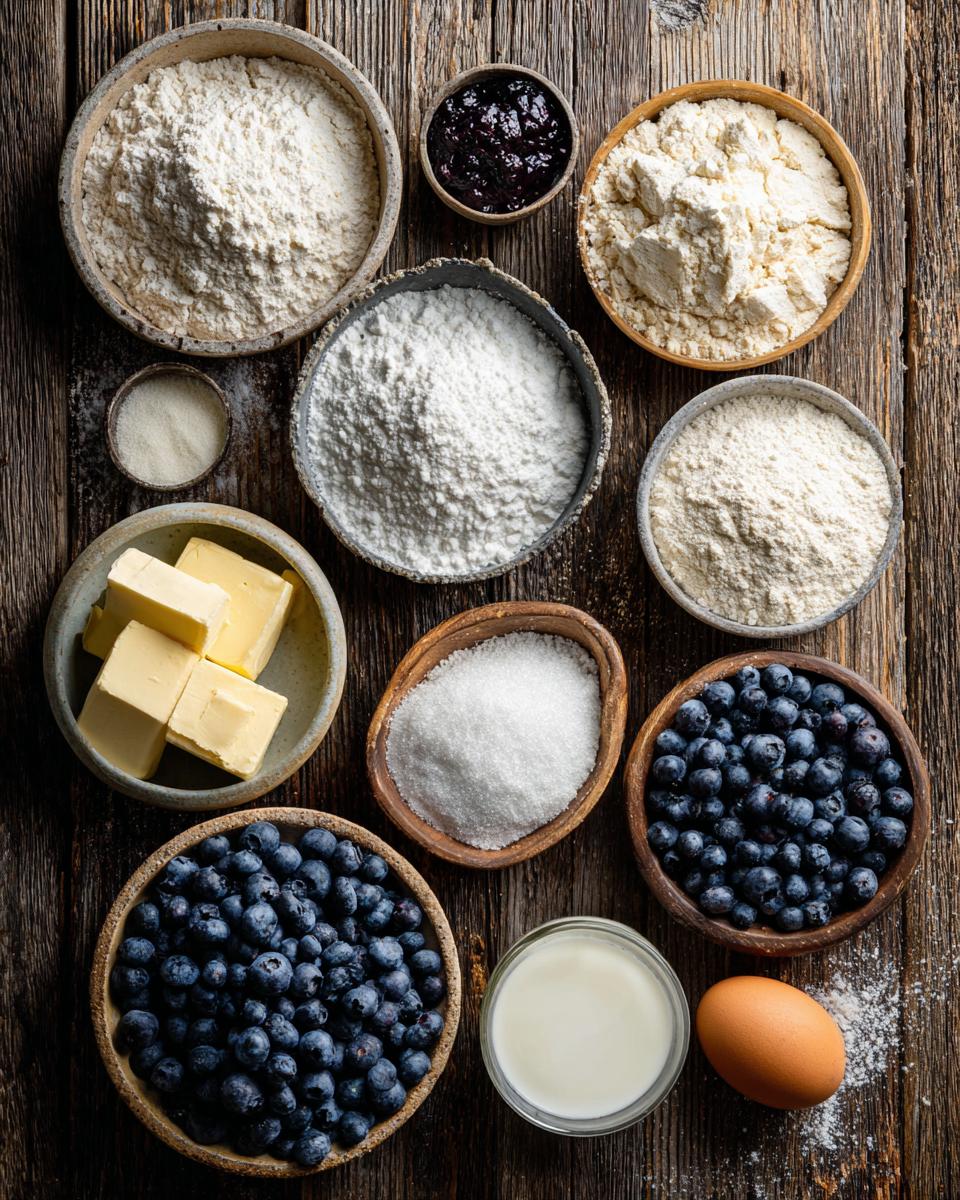
Alright, let’s talk ingredients! The magic of these moist gluten-free blueberry scones all comes down to a few simple – but important – players. I’ve learned through trial and error (and many batches of hockey-puck scones) that quality and prep matter just as much as the recipe itself. Here’s what you’ll need:
- 2 cups gluten-free flour: Use a 1:1 blend (I swear by Bob’s Red Mill) so you don’t have to fuss with xanthan gum. The blend already has it mixed in for perfect texture.
- 1/3 cup granulated sugar: Just enough sweetness to let those blueberries shine without turning breakfast into dessert.
- 1 tbsp baking powder: Go aluminum-free here – it makes a huge difference in taste. Nobody wants metallic-tasting scones!
- 1/2 tsp salt: My grandma always said this is what makes flavors “pop.” She wasn’t wrong.
- 1/2 cup cold unsalted butter, cubed: I can’t stress this enough – COLD is key. Cube it first, then pop it back in the fridge until the very last second. Those cold butter bits are what create those dreamy flaky layers.
- 1/2 cup whole milk: Or your favorite dairy-free milk if needed. The fat in whole milk gives the best texture though.
- 1 large egg: Room temperature works best here – it binds everything together beautifully.
- 1 tsp pure vanilla extract: The good stuff! It adds this warm background note that makes people go “hmm, what’s that delicious flavor?”
- 1 cup fresh blueberries: Frozen work too (no thawing!), but fresh berries give you those gorgeous, intact bursts of fruit. If using frozen, don’t defrost – just toss them in frozen to prevent a purple dough situation.
See? Nothing too crazy or hard to find. Just good, simple ingredients treated with a little love and care. Now let’s make some magic!
How to Make Moist Gluten-Free Blueberry Scones
Okay, let’s get baking! Making these moist gluten-free blueberry scones is easier than you think – just follow these simple steps and you’ll have golden, flaky perfection in no time. I’ve included all my little tricks along the way to guarantee success!
Step 1: Preheat and Prep
First things first – crank that oven to 400°F (200°C). This high heat gives our scones that perfect rise and golden crust. While it’s heating up, line your baking sheet with parchment paper. (Trust me, you don’t want to skip this – gluten-free dough can be sticky!) I like to use a half-sheet pan because it gives the scones plenty of room to spread.
Step 2: Mix Dry Ingredients
Grab a big mixing bowl and whisk together your gluten-free flour, sugar, baking powder, and salt. And I mean REALLY whisk – you want to aerate that flour and make sure everything is evenly distributed. This is your chance to get rid of any lumps too. I usually whisk for about 30 seconds – it makes all the difference in getting those light, tender scones we’re after.
Step 3: Cut in Butter
Here comes the fun part! Take your cold cubed butter (I told you to keep it cold, right?) and scatter it over the dry ingredients. Now, using a pastry cutter or two knives, cut that butter in until the mixture looks like coarse crumbs with some pea-sized butter pieces remaining. This is what creates those dreamy flaky layers! Pro tip: If your hands get warm, pop the bowl in the fridge for 5 minutes – we want that butter to stay cold.
Step 4: Combine Wet Ingredients
In a separate bowl (or measuring cup), whisk together the milk, egg, and vanilla until smooth. Make a well in your dry ingredients and pour the wet mixture in all at once. Now, here’s the key – stir gently with a fork JUST until the dough comes together. It’ll look shaggy and messy – that’s perfect! Overmixing is the enemy of tender scones.
Step 5: Fold in Blueberries
Time for the star of the show! Sprinkle your blueberries over the dough (if using frozen, toss them in a tablespoon of gluten-free flour first). Now, with the gentlest hands you’ve got, fold them in using just a few strokes. Some berries will break – that’s okay – but try to keep most intact. If you’re using frozen berries, don’t be alarmed if the dough starts turning purple – it’s totally normal!
Step 6: Shape and Bake
Turn your dough out onto the prepared baking sheet and pat it into an 8-inch circle about 3/4-inch thick. Using a sharp knife (run it under hot water first for clean cuts), slice into 8 wedges – but don’t separate them completely. This helps them bake evenly. Pop them in the oven for 18-20 minutes until they’re golden brown at the edges and sound hollow when tapped on the bottom. Oh, and that heavenly smell? That’s how you know they’re done!
Let them cool for just a few minutes before serving – they’re absolute perfection when still slightly warm. See? Making moist gluten-free blueberry scones isn’t just easy – it’s downright therapeutic!
Tips for Perfect Moist Gluten-Free Blueberry Scones
After making these beauties more times than I can count, I’ve picked up some tricks that’ll take your scone game to the next level. These are the little things that make a big difference!
- Chill that dough! If your dough feels too sticky when shaping (especially on warm days), just pop it in the fridge for 10 minutes. Cold dough holds its shape better and gives you those picture-perfect wedges. I sometimes even chill the shaped dough before baking for extra height.
- Knife matters. A dull knife will squish rather than slice. Run your knife under hot water and wipe it dry before cutting – you’ll get clean edges that bake up beautifully. My grandma’s old butcher knife works like a charm here!
- Golden glow-up. For that gorgeous bakery-style finish, lightly brush the tops with milk (or cream if you’re feeling fancy) before baking. It gives them that irresistible golden crust that makes everyone reach for seconds.
- Berry protection. Toss those blueberries in a spoonful of gluten-free flour before folding them in. This little trick prevents them from sinking to the bottom during baking – every bite gets berry goodness!
- Patience is key. I know it’s tempting, but let them cool on the pan for at least 5 minutes before moving. Gluten-free baked goods need a minute to set up properly so they don’t crumble apart. Trust me, they’ll still be plenty warm!
The best part? Once you’ve made these a few times, you’ll develop your own little tricks too. That’s the joy of baking – every batch teaches you something new!
Storage and Reheating Instructions
Now, here’s the good news – these moist gluten-free blueberry scones are just as delicious the next day (if they last that long in your house!). I’ve learned a few tricks over the years to keep them tasting fresh-baked. Here’s how to store and revive them like a pro:
- Room temp magic: Once completely cooled, store your scones in an airtight container at room temperature for up to 2 days. I like using my grandma’s old cookie tin – it keeps them from drying out while letting them breathe just enough.
- Freezer-friendly: These scones freeze beautifully! Wrap each one individually in plastic wrap, then pop them all in a freezer bag. They’ll keep for about a month. Pro tip: Write the date on the bag – trust me, future-you will thank present-you when breakfast is ready in minutes!
- Reviving leftovers: To bring back that fresh-from-the-oven magic, reheat scones in a 300°F oven for about 5 minutes. No oven? A quick 15-second zap in the microwave works in a pinch, but the oven method keeps the texture perfect.
- On-the-go option: Frozen scone in your lunchbox? By midday, it’ll be thawed and ready to enjoy at room temp. The blueberries stay juicy even after thawing – it’s like nature’s little moisture packets!
Funny story – I once found a forgotten scone in my freezer from three weeks prior. Gave it the oven treatment, and you’d swear it was baked that morning! That’s the beauty of this recipe – it’s forgiving and stays delicious no matter when you enjoy it.
FAQs About Moist Gluten-Free Blueberry Scones
Can I use frozen blueberries?
Absolutely! Frozen blueberries work great in these scones. Just make sure to use them straight from the freezer—don’t thaw them first. To prevent your dough from turning purple, toss the frozen berries in a tablespoon of gluten-free flour before folding them in. And if you’re worried about excess moisture, pat them dry with a paper towel first. They’ll bake up just as juicy and delicious as fresh ones!
Why did my scones spread too much?
Ah, the dreaded spread! This usually happens when the butter gets too warm or if you overmix the dough. Remember, cold butter is your best friend here—it creates those flaky layers while keeping the scones from spreading. Also, resist the urge to overmix the dough. It should look shaggy and messy—not smooth. If your kitchen is warm, pop the dough in the fridge for 10 minutes before shaping and baking. That extra chill makes all the difference!
What’s the best gluten-free flour blend?
I’ve tested a bunch, and my go-to is a 1:1 gluten-free flour blend like Bob’s Red Mill. These blends already have xanthan gum mixed in, which helps mimic the structure of gluten. No need to add anything extra! Just make sure your blend doesn’t have too much bean flour (like chickpea or fava), as it can give the scones a weird aftertaste. Stick with a rice or sorghum-based blend for the best results.
Can I make these scones dairy-free?
You sure can! Swap the butter for a high-quality vegan butter (I like Miyoko’s or Earth Balance) and use your favorite dairy-free milk. Just make sure everything stays cold—that’s the secret to flaky scones, dairy or not. And don’t skip the chilling step before baking—it helps the dairy-free versions hold their shape beautifully.
How do I know when the scones are done baking?
Look for golden edges and a slightly firm top. When you tap the bottom of a scone, it should sound hollow. If you’re unsure, insert a toothpick near the center—it should come out with just a few moist crumbs, not wet batter. And trust your nose! That heavenly, buttery aroma is a sure sign they’re ready to come out of the oven.
Nutritional Information
Okay, let’s talk numbers – but don’t worry, these moist gluten-free blueberry scones are totally worth every delicious bite! Here’s the breakdown per scone (because let’s be real, nobody stops at just one):
- Calories: 240 – Perfect for a satisfying breakfast or afternoon pick-me-up
- Fat: 12g – Mostly from that glorious butter that makes them so flaky
- Carbs: 30g – With 2g coming from fiber thanks to the gluten-free flour
- Protein: 4g – Not bad for a sweet treat!
Now, here’s my philosophy – these scones are made with real, wholesome ingredients. No weird additives or artificial stuff. Just good old-fashioned baking with a gluten-free twist. And when you consider they’re packed with antioxidant-rich blueberries? That’s what I call a win-win situation!
Share Your Moist Gluten-Free Blueberry Scones
I’d absolutely love to see your scone creations! There’s something so special about sharing what comes out of our kitchens—the triumphs, the tasty accidents, and everything in between. Snap a photo of your golden beauties (especially if you got that perfect crack down the middle—you know the one!) and tag me on Instagram. I’ll be cheering you on from my flour-dusted corner of the internet.
Did you add your own twist? Maybe some lemon zest or a drizzle of icing? Tell me all about it in the comments below! Your variations might just inspire someone else’s next baking adventure. And if these scones become a regular in your kitchen like they are in mine, consider leaving a star rating—it helps other bakers know this recipe’s worth trying.
Happy baking, friends! May your scones be flaky, your blueberries plentiful, and your coffee always hot. Now go enjoy that well-earned treat—you’ve baked something wonderful today.
PrintMoist Gluten-Free Blueberry Scones

Enjoy these moist gluten-free blueberry scones perfect for breakfast or a snack.
- Prep Time: 15 mins
- Cook Time: 20 mins
- Total Time: 35 mins
- Yield: 8 scones 1x
- Category: Breakfast
- Method: Baking
- Cuisine: American
- Diet: Gluten Free
Ingredients
- 2 cups gluten-free flour
- 1/3 cup sugar
- 1 tbsp baking powder
- 1/2 tsp salt
- 1/2 cup cold butter, cubed
- 1/2 cup milk
- 1 egg
- 1 tsp vanilla extract
- 1 cup fresh blueberries
Instructions
- Preheat oven to 400°F (200°C). Line a baking sheet with parchment paper.
- In a large bowl, mix gluten-free flour, sugar, baking powder, and salt.
- Cut in cold butter until mixture resembles coarse crumbs.
- In a separate bowl, whisk milk, egg, and vanilla.
- Pour wet ingredients into dry ingredients. Stir until just combined.
- Gently fold in blueberries.
- Shape dough into a circle on the baking sheet. Cut into 8 wedges.
- Bake for 18-20 minutes until golden.
- Cool slightly before serving.
Notes
- Use cold butter for flaky texture.
- Do not overmix the dough.
- Frozen blueberries work but may bleed color.
Nutrition
- Serving Size: 1 scone
- Calories: 240
- Sugar: 12g
- Sodium: 280mg
- Fat: 12g
- Saturated Fat: 7g
- Unsaturated Fat: 4g
- Trans Fat: 0g
- Carbohydrates: 30g
- Fiber: 2g
- Protein: 4g
- Cholesterol: 45mg


