Oh, my goodness, you are in for such a treat today! If you’ve ever dreamt of baking a cake that’s light as air, delicate, and just melts in your mouth, then you’ve come to the right place. We’re diving headfirst into the magic of the Genoise Cake, a true classic that, I promise, isn’t nearly as intimidating as it sounds. For years, I shied away from making Genoise, thinking it was some kind of pastry chef secret I’d never master. I mean, who hasn’t heard horror stories of sunken cakes and dense sponges?
But let me tell you, once you get the hang of it, this French beauty is pure joy! My first successful Genoise Cake felt like a culinary triumph – a fluffy, golden cloud that was perfect for layering with fresh cream and berries. It’s the kind of cake that makes people gasp a little when you serve it, then wonder how something so simple can taste so utterly divine. It’s a testament to the elegance of French baking, where quality ingredients and precise technique create something truly extraordinary. Get ready to fall in love!

Why You’ll Love This Genoise Cake
Okay, so why should you add this gorgeous Genoise Cake to your baking repertoire? Trust me, there are so many reasons! It’s not just a cake; it’s an experience. You’ll absolutely adore it because:
- It’s unbelievably light: Seriously, it’s like eating a sweet cloud.
- So versatile: It’s the perfect canvas for almost any filling – fruit, cream, chocolate ganache!
- Classic appeal: This is the cake that says “elegant” without being fussy.
- Easier than you think: Once you get the hang of a few simple steps, you’ll wonder why you ever hesitated.
- Delicious results: The subtle vanilla flavor and tender crumb are just divine!
The Allure of a Classic Genoise Cake
There’s just something so captivating about a classic Genoise Cake, isn’t there? It’s got this rich history, dating back centuries, and it really embodies that elegant simplicity that French baking is famous for. It’s not about overwhelming flavors, but rather celebrating the quality of a few good ingredients. Every bite feels a little special, a little sophisticated, making it a beloved dessert that never goes out of style. You’ll feel like a fancy pastry chef, I promise!
Essential Equipment for Your Genoise Cake
Alright, let’s talk tools! You don’t need a fancy professional kitchen to whip up a fantastic Genoise Cake, but having the right gear makes all the difference. Think of these as your trusty sidekicks in achieving that perfect, airy texture. Most of these are probably already hanging out in your kitchen, just waiting for their moment to shine. Getting them ready before you start will make the whole process so much smoother, trust me!
Tools for a Fluffy Genoise Cake
For this beautiful Genoise Cake, you’ll definitely want a heatproof bowl and a saucepan for gently warming those eggs. An electric mixer (handheld or stand mixer, either works!) is crucial for getting that amazing volume. And, of course, an 8-inch round cake pan is perfect for baking it up just right. Don’t forget a fine-mesh sieve for sifting that flour!
Ingredients for a Light Genoise Cake
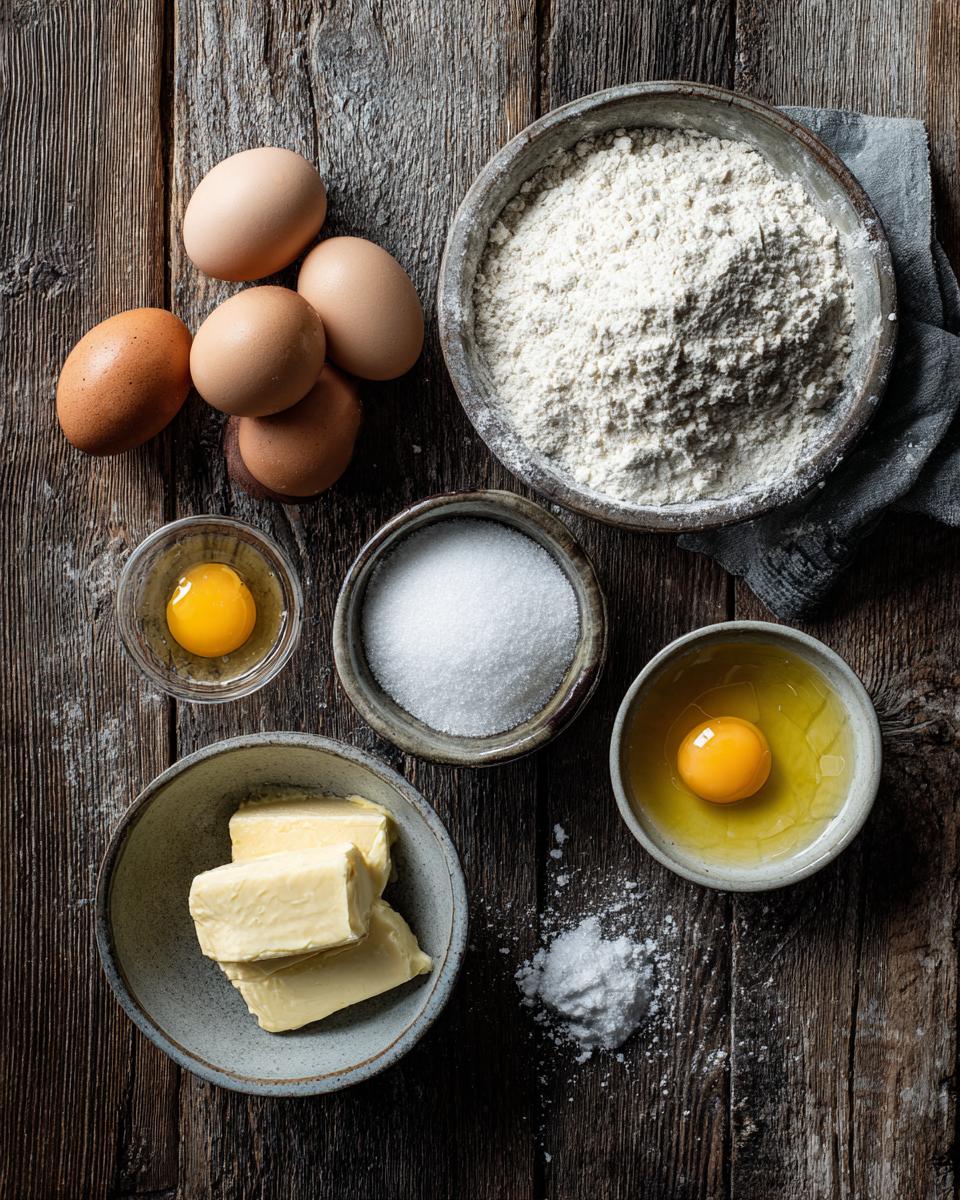
Okay, now for the good stuff – what you’ll need to make this incredible Genoise Cake! The beauty of this recipe is its simplicity; we’re talking about just a few humble ingredients that, when treated with a little love and care, transform into something truly magical. No weird, hard-to-find stuff here, just pantry staples. But here’s the kicker: quality matters, especially with so few ingredients doing all the heavy lifting. So, grab your apron, and let’s get these beauties lined up!
- 4 large eggs: Straight from the fridge, but let them warm up to room temperature. This is super important for getting that amazing volume when you whip them!
- 100g granulated sugar: Just your regular white sugar, it’s going to work wonders in stabilizing those eggs.
- 100g all-purpose flour, sifted: Sifting is key here, friends! It helps keep the cake light and airy. Don’t skip it!
- 30g unsalted butter, melted: Make sure it’s melted and then slightly cooled down. We don’t want to scramble our eggs!
- 1 teaspoon alcohol-free vanilla extract: For that lovely, subtle warmth and aroma.
Crafting Your Genoise Cake: Step-by-Step Instructions
Alright, bakers, this is where the magic happens! Don’t fret, I’m going to walk you through each step of making this gorgeous Genoise Cake. It’s all about technique and a little bit of patience, but I promise, the results are so worth it. Follow these steps carefully, and you’ll be pulling a beautiful, light-as-air cake out of your oven in no time. We’re going to create something truly special together, so let’s get baking!
Preparing the Batter for Your Genoise Cake
First things first, let’s get that oven preheating to 175°C (that’s 350°F for my US friends). While it’s warming up, grease and flour your 8-inch round cake pan. This little step is super important to prevent sticking, trust me on this! Now, grab a heatproof bowl and set it over a saucepan with just a little simmering water – don’t let the bowl touch the water! Whisk your eggs and sugar in that bowl until it’s warm to the touch (around 40°C or 100°F). You want the sugar to be completely dissolved. Once it’s warm, pull it off the heat and get your electric mixer going! Beat that mixture on high speed until it’s thick, pale, and has tripled in volume – this can take about 10 glorious minutes. This is the heart of your Genoise Cake, so don’t rush it! Next, gently, oh so gently, fold in your sifted flour in two additions until it’s just combined. And finally, fold in that melted butter and alcohol-free vanilla extract. Be careful not to deflate all that lovely air you just whipped in!
Baking and Cooling Your Genoise Cake
Now that your batter is ready, pour it carefully into your prepared pan. Pop it into your preheated oven for about 25-30 minutes. You’ll know it’s done when a wooden skewer inserted into the center comes out clean. Once it’s baked to perfection, let your beautiful Genoise Cake cool in the pan for about 10 minutes. This little resting period helps it firm up before you go flipping it out. Then, carefully invert it onto a wire rack to cool completely. Patience, my friend, patience! You want it completely cool before you even think about slicing or decorating.
Tips for a Flawless Genoise Cake
Okay, you’ve got the steps down, but here are my absolute best tips for making sure your Genoise Cake comes out perfectly every single time. These are the little secrets that make all the difference, trust me! First, don’t, and I mean DON’T, overmix the batter once you’ve added the flour. That’s a one-way ticket to a tough, dense cake, and we want light and airy, remember? Also, those room temperature eggs? Super important! They whip up so much better and give you that incredible volume. Finally, be gentle when folding in the butter and vanilla; you worked hard to get all that air in, so let’s keep it there!
Genoise Cake Variations and Serving Suggestions
The beauty of a Genoise Cake is how wonderfully versatile it is! While it’s absolutely divine on its own, you can totally jazz it up. Try brushing the layers with a little fruit syrup (like raspberry or orange!) for extra flavor and moisture. Or, for a chocolatey twist, you can replace a small amount of flour with cocoa powder. My favorite way to serve it? Piled high with fresh, seasonal berries and a generous dollop of freshly whipped cream. It’s simple, elegant, and lets that delicate cake shine!
Genoise Cake: Frequently Asked Questions
I know you’ve probably got a few questions swirling around in your head about this delicate Genoise Cake, especially if it’s your first time making one! Don’t worry, I’ve heard them all, and I’m here to clear up any confusion. Think of me as your personal Genoise Cake hotline! These are some of the most common things people ask me, and getting these answers down will help you feel super confident in your baking journey.
Can I make Genoise Cake ahead of time?
Oh, absolutely! That’s one of the beauties of this Genoise Cake. You can bake the cake layers a day or two in advance. Once it’s completely cooled, wrap it tightly in plastic wrap (or even a double layer!) to prevent it from drying out. Store it at room temperature, and it’ll be perfectly fresh and ready for you to assemble and decorate when you need it. This makes entertaining so much easier!
What is the difference between a Genoise Cake and a regular sponge cake?
Great question! While both are types of sponge cakes, the main difference lies in how the fat is incorporated. For a classic Genoise Cake, a small amount of melted butter is folded in at the very end. In many other sponge cakes, there’s either no added fat (like an angel food cake) or the fat is creamed with sugar at the beginning. That little bit of butter in the Genoise gives it a slightly richer flavor and a more tender crumb while still keeping it super light!
Estimated Nutritional Information for Genoise Cake
Just a little heads-up on what you’re getting with a slice of this delicious Genoise Cake! Please remember, these are just estimates, and they can totally vary depending on your exact ingredients and how you cut your slices. But generally, for one serving, you’re looking at around 250 calories, about 12g of fat (with 7g saturated), 30g of carbohydrates, 5g of protein, and 20g of sugar. Not too shabby for such a delightful treat!
Share Your Genoise Cake Experience
Okay, now it’s your turn! I absolutely LOVE hearing from you all and seeing your kitchen triumphs. So, once you’ve whipped up this gorgeous Genoise Cake, please, please, please come back and tell me all about it in the comments below! Did you add any fun variations? What did you serve it with? Don’t forget to rate the recipe, and if you snap a picture, share it on Instagram and tag me! I can’t wait to see your beautiful creations!
PrintGenoise Cake from Scratch

A classic French sponge cake, light and airy, perfect for layering or serving simply with fruit.
- Prep Time: 20 minutes
- Cook Time: 30 minutes
- Total Time: 50 minutes
- Yield: 8 servings 1x
- Category: Dessert
- Method: Baking
- Cuisine: French
- Diet: Vegetarian
Ingredients
- 4 large eggs
- 100g granulated sugar
- 100g all-purpose flour
- 30g unsalted butter, melted
- 1 teaspoon vanilla extract (alcohol-free)
Instructions
- Preheat oven to 175°C (350°F). Grease and flour an 8-inch round cake pan.
- In a heatproof bowl set over a saucepan of simmering water, whisk eggs and sugar until warm (about 40°C/100°F) and sugar is dissolved.
- Remove from heat and beat with an electric mixer on high speed until thick, pale, and tripled in volume (about 10 minutes).
- Gently fold in the sifted flour in two additions until just combined.
- Fold in the melted butter and vanilla extract until fully incorporated.
- Pour batter into the prepared pan and bake for 25-30 minutes, or until a wooden skewer inserted into the center comes out clean.
- Let cool in the pan for 10 minutes before inverting onto a wire rack to cool completely.
Notes
- Do not overmix the batter once flour is added, as this can toughen the cake.
- For best results, use room temperature eggs.
- Serve with fresh berries and whipped cream.
Nutrition
- Serving Size: 1 slice
- Calories: 250
- Sugar: 20g
- Sodium: 50mg
- Fat: 12g
- Saturated Fat: 7g
- Unsaturated Fat: 4g
- Trans Fat: 0g
- Carbohydrates: 30g
- Fiber: 1g
- Protein: 5g
- Cholesterol: 100mg


