You know those fancy bakery pastries that look impossible to make at home? Well, guess what – this Easy Puff Pastry Cheese Danish is about to become your new breakfast hero! I used to think Danish pastries were strictly for professional bakers until I discovered this ridiculously simple version. My first attempt was a messy, flour-covered disaster (I may have gotten a little too enthusiastic with the powdered sugar), but now I can whip these up before my coffee’s even finished brewing. The magic? Store-bought puff pastry does all the hard work for you while that creamy, dreamy cheese filling makes it taste like you spent hours in the kitchen. Trust me, once you try these warm, flaky delights fresh from your own oven, you’ll never look at a bakery case the same way again.
Why You’ll Love This Easy Puff Pastry Cheese Danish
Oh, where do I even start? This recipe is my go-to when I want something impressive with minimal effort (and trust me, I’m all about that). You’re going to adore it because:
- It’s shockingly quick – we’re talking less than 30 minutes start to finish. Perfect for lazy Sunday mornings or last-minute guests.
- The flaky layers from that buttery puff pastry? Absolute magic. No one needs to know you didn’t make it from scratch.
- That creamy filling – sweet, tangy, and just rich enough to feel indulgent without being heavy.
- It’s foolproof. Even if you’re usually a baking disaster (raises hand), this one won’t let you down.
Seriously, it’s like having a fancy bakery treat without the fuss or the price tag. What’s not to love?
Ingredients for Easy Puff Pastry Cheese Danish
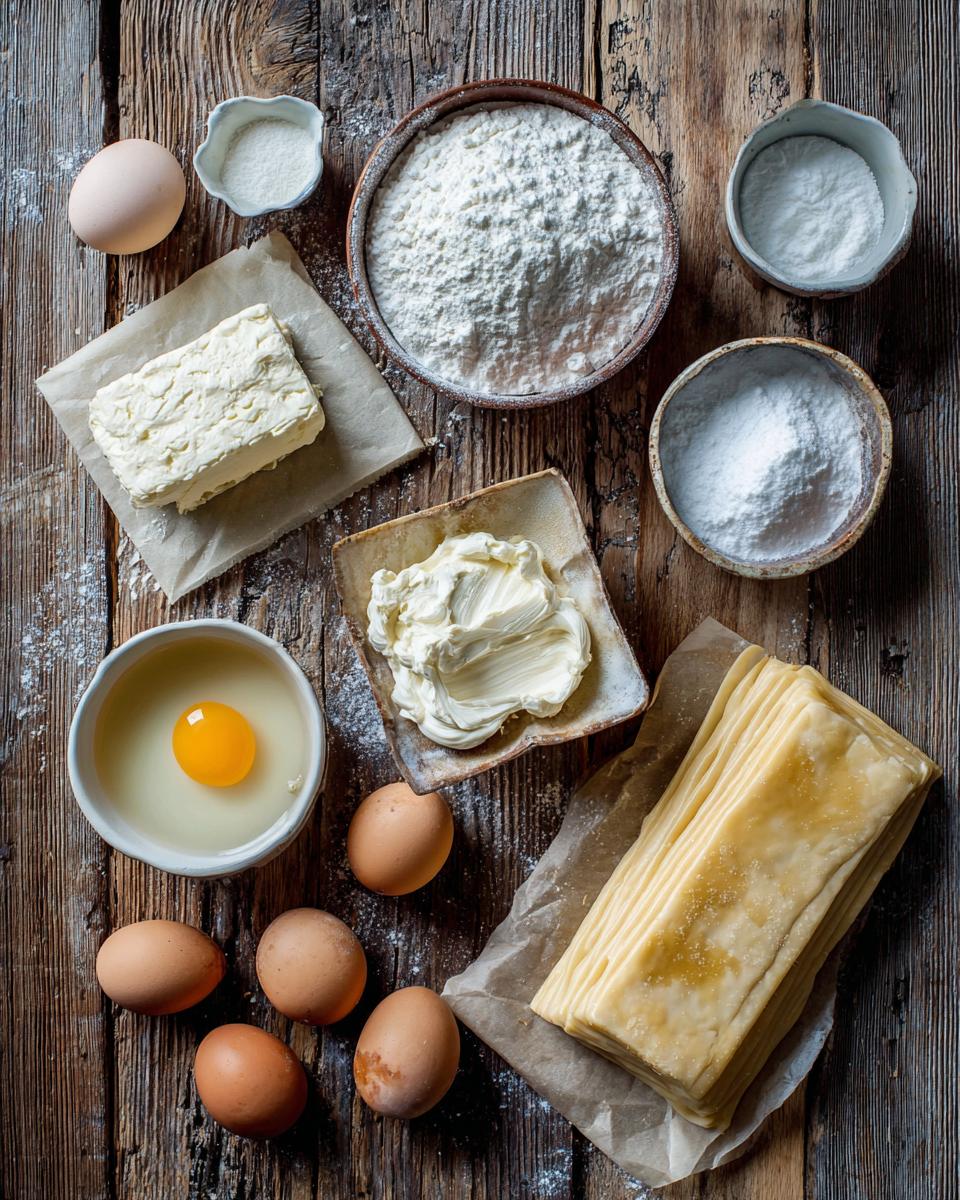
Here’s what you’ll need to make these heavenly pastries. Don’t worry, it’s a short list – I promise you probably have most of this in your kitchen already!
- 1 sheet puff pastry, thawed (I always keep a box in the freezer for moments like this)
- 8 oz cream cheese, softened (leave it out for about 30 minutes – it makes mixing so much easier)
- 1/4 cup granulated sugar (I’ve tried less, but trust me, this is the sweet spot)
- 1 egg yolk (save the white for an omelet later!)
- 1 tsp vanilla extract (the good stuff makes a difference here)
- 1 large egg, beaten (this is your egg wash for that gorgeous golden finish)
- 2 tbsp powdered sugar (optional, but it adds that bakery-style touch)
That’s it! Simple, right? Now let’s turn these into the most delicious Danish pastries you’ve ever tasted.
Equipment You’ll Need
Now, don’t stress – you don’t need fancy equipment for these Danish pastries. Just grab:
- A standard baking sheet (mine’s looking well-loved, but it gets the job done)
- Parchment paper – lifesaver for easy cleanup
- A mixing bowl (any size will do)
- A whisk or fork for blending that creamy filling
See? Told you it was simple. Now let’s get baking!
How to Make Easy Puff Pastry Cheese Danish
Okay, let’s turn these simple ingredients into bakery-worthy pastries! I promise it’s easier than you think. Just follow these steps, and soon your kitchen will smell like a European café (minus the airplane ticket).
Preparing the Filling
First, let’s make that dreamy cream cheese filling. In your mixing bowl, combine the softened cream cheese, granulated sugar, egg yolk, and vanilla. Now here’s my secret – beat it until it’s completely smooth with no lumps. I mean silky-smooth, like you’re making cheesecake batter. This usually takes me about 2 minutes of vigorous whisking (great arm workout!). If you spot any stubborn lumps, just keep at it – they’ll disappear with persistence. Taste a tiny bit (chef’s privilege!) and adjust sweetness if needed.
Assembling the Danish
Unfold your thawed puff pastry sheet on a lightly floured surface. Pro tip: if it’s sticking, sprinkle just a dusting of flour underneath. Cut the sheet into 4 equal rectangles – I use a pizza cutter because it’s fast, but a sharp knife works too. Spoon about 2 tablespoons of filling onto each rectangle, placing it right in the center. Now for the fun part: fold two opposite corners toward the center, then the other two, creating a little “package” with the filling peeking out in the middle. Don’t stress about perfection – rustic is charming! Brush the pastry with beaten egg for that gorgeous golden shine.

Baking and Finishing
Pop your assembled Danish onto a parchment-lined baking sheet and into a 400°F (200°C) preheated oven. Bake for 15-18 minutes – you’ll know they’re done when the pastry puffs up dramatically and turns a beautiful golden brown. My oven runs hot, so I start checking at 14 minutes. Let them cool for about 5 minutes (the hardest wait of your life), then dust with powdered sugar if you’re feeling fancy. The filling will be slightly puffed and creamy, the pastry flaky and crisp. Try not to eat them all at once – though I won’t judge if you do!
Tips for Perfect Easy Puff Pastry Cheese Danish
Want to nail these Danish pastries every time? Here are my tried-and-true tips: Keep the puff pastry cold until you’re ready to work with it – it’s much easier to handle. Don’t overfill the center; a couple of tablespoons is plenty. And always check for doneness by looking for that golden-brown color and flaky texture. Simple, right? You’ve got this!
Variations for Easy Puff Pastry Cheese Danish
Once you’ve mastered the basic version, try these fun twists! Swirl in some raspberry jam before baking for a pop of fruitiness. Add lemon zest to the filling for bright freshness, or sprinkle cinnamon sugar on top before baking. Feeling fancy? Top with fresh berries after they come out of the oven!
Serving and Storing Easy Puff Pastry Cheese Danish
Oh, you have to eat these warm if you can wait that long! The pastry stays crisp while the filling turns gloriously creamy – absolute perfection with your morning coffee. If you miraculously have leftovers (rare in my house), pop them in an airtight container for up to 2 days. A quick 10-second zap in the microwave brings back that fresh-from-the-oven magic. Pro tip: they’re also amazing cold straight from the fridge when that midnight sweet tooth hits!
Nutritional Information
Now, I know what you’re thinking – “How bad is this deliciousness going to be for my waistline?” Let’s be real here, we’re talking buttery puff pastry and cream cheese filling, so this isn’t exactly health food. But hey, everything in moderation, right?
The exact nutrition will vary depending on the brands you use and how generous you are with that powdered sugar dusting (no judgment from me!). What I can tell you is that each Danish gives you that perfect balance of protein from the cheese and eggs, with just enough sweetness to satisfy your cravings. They’re rich enough that one is usually plenty – though I won’t tell if you sneak a second!
Remember, nutritional values are always estimates. If you’re watching specific numbers, just check the labels on your particular ingredients. But sometimes, especially when it comes to warm, flaky pastries fresh from the oven, it’s okay to just enjoy the moment without overanalyzing!
Frequently Asked Questions
Can I use store-bought puff pastry? Absolutely! Store-bought puff pastry is actually my secret weapon here. Just make sure it’s thawed but still cold when you work with it – it makes handling so much easier.
How long do leftovers last? These Danish pastries are best fresh, but if you have leftovers (lucky you!), store them in an airtight container for up to 2 days. A quick warm-up in the microwave brings them back to life.
Can I freeze the unbaked Danish? Yes! Assemble them, then freeze on a baking sheet before transferring to a freezer bag. When you’re ready to bake, just add a few extra minutes to the baking time.
What if I don’t have powdered sugar? No worries! They’re just as delicious without it, or you can sprinkle a little granulated sugar on top before baking for a sweet crunch.
Now, what are you waiting for? Grab that puff pastry and start baking! And don’t forget to share your results – I’d love to see your creations!
PrintEasy Cheese Danish with Puff Pastry

A simple and delicious puff pastry cheese Danish you can make at home.
- Prep Time: 10 minutes
- Cook Time: 18 minutes
- Total Time: 28 minutes
- Yield: 4 servings 1x
- Category: Dessert
- Method: Baking
- Cuisine: Danish
- Diet: Vegetarian
Ingredients
- 1 sheet puff pastry, thawed
- 8 oz cream cheese, softened
- 1/4 cup granulated sugar
- 1 egg yolk
- 1 tsp vanilla extract
- 1 egg, beaten (for egg wash)
- 2 tbsp powdered sugar (optional)
Instructions
- Preheat oven to 400°F (200°C). Line a baking sheet with parchment paper.
- Roll out puff pastry sheet and cut into 4 equal rectangles.
- Mix cream cheese, sugar, egg yolk, and vanilla until smooth.
- Spoon cheese mixture onto the center of each pastry rectangle.
- Fold pastry edges over the filling, leaving the center exposed.
- Brush pastry with beaten egg.
- Bake for 15-18 minutes until golden brown.
- Cool slightly and dust with powdered sugar if desired.
Notes
- Use cold puff pastry for easier handling.
- Let Danish cool slightly before serving.
- Store leftovers in an airtight container.
Nutrition
- Serving Size: 1 Danish
- Calories: 320
- Sugar: 12g
- Sodium: 220mg
- Fat: 22g
- Saturated Fat: 10g
- Unsaturated Fat: 9g
- Trans Fat: 0g
- Carbohydrates: 25g
- Fiber: 1g
- Protein: 6g
- Cholesterol: 85mg


