Oh, Devil’s Food Cake! Just the name conjures up images of deep, dark, unbelievably rich chocolatey goodness, doesn’t it? This isn’t just any chocolate cake; it’s a classic for a reason, a true icon in the world of desserts. My first encounter with a proper Devil’s Food Cake was at a childhood birthday party, and honestly, it was love at first bite. That intense cocoa flavor, that incredible moist crumb… I was hooked!
For years, I’ve been on a mission to perfect my own Devil’s Food Cake recipe, and trust me, I’ve baked a lot of cakes in my time. This isn’t just reliable; it’s downright delicious, a recipe I’ve shared with countless friends and family, always to rave reviews. It hits all the right notes every single time, giving you that truly indulgent, classic Devil’s Food Cake experience that everyone craves. Get ready to fall in love!

Why You’ll Love This Devil’s Food Cake
Okay, so why this Devil’s Food Cake recipe, you ask? Because it’s not just a cake; it’s an experience! You’ll absolutely adore it because:
- It’s incredibly rich and deeply chocolatey, without being overly sweet.
- The texture is unbelievably moist and tender, practically melting in your mouth.
- It’s surprisingly simple to make, even for beginner bakers.
- The frosting is pure heaven – smooth, creamy, and packed with cocoa flavor.
- It’s a total crowd-pleaser; prepare for endless compliments!
The Ultimate Devil’s Food Cake Experience
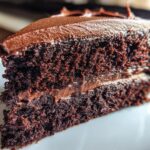
Get ready for pure chocolate bliss! This Devil’s Food Cake delivers that intense, dark cocoa flavor you crave, paired with a crumb so tender and moist it’s almost fudgy. Every bite is an indulgent escape, making it the ultimate treat for any celebration or just because you deserve something truly spectacular.
Essential Equipment for Your Devil’s Food Cake
Alright, before we dive into the magic, let’s make sure you’ve got your kitchen arsenal ready! You don’t need anything super fancy for this Devil’s Food Cake, just a few basic tools that’ll make the whole process smooth sailing. Trust me, having the right gear makes all the difference!
Tools for a Perfect Devil’s Food Cake
For this divine Devil’s Food Cake, you’ll definitely want two 9-inch round cake pans, a good electric mixer (stand or hand-held works!), and a couple of large mixing bowls. Oh, and a wire rack for cooling is a must!
Ingredients for the Best Devil’s Food Cake
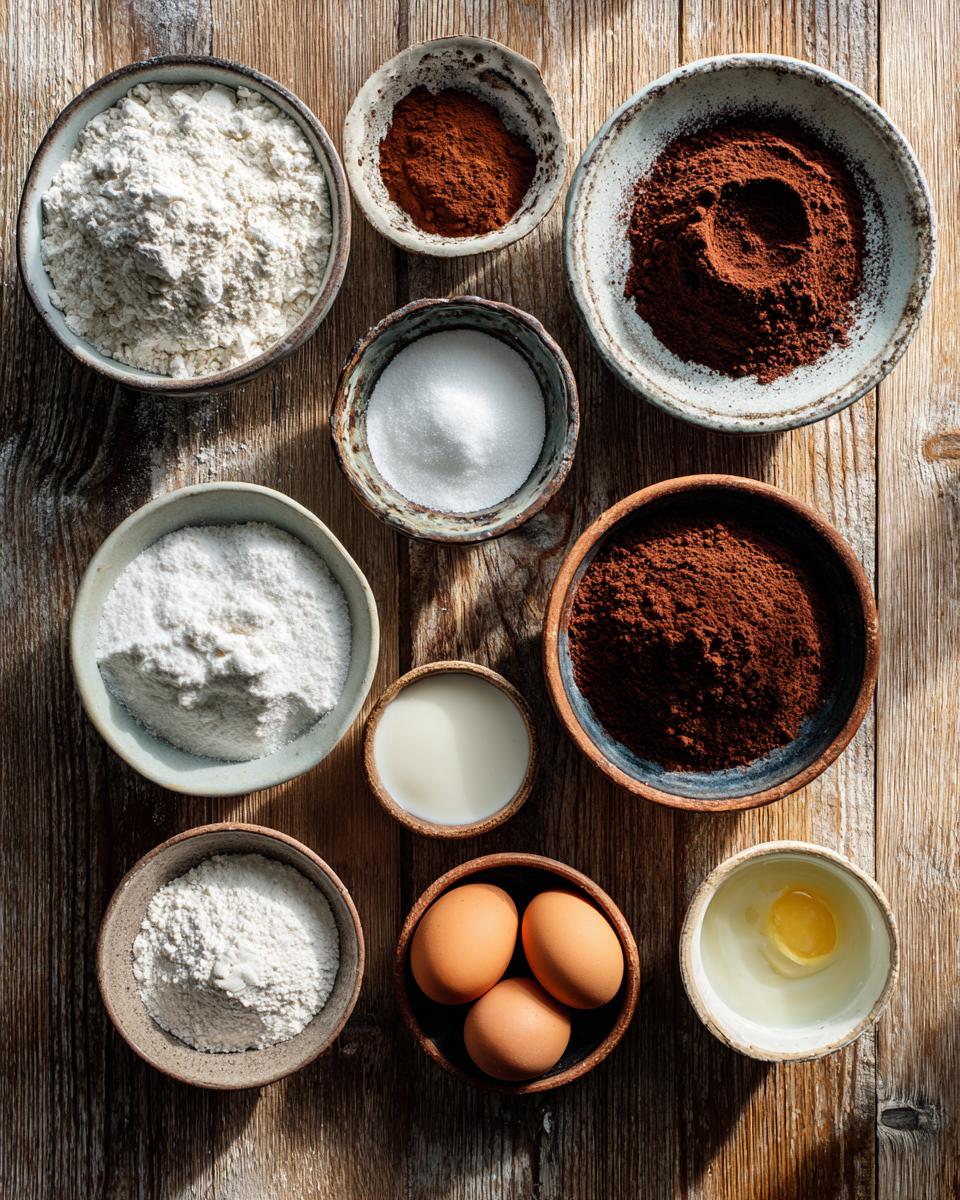
Okay, friends, this is where the magic really begins! Like any great recipe, the key to the best Devil’s Food Cake lies in starting with fantastic ingredients. I’ve broken it down for you, making sure everything is super clear. No guesswork here, just pure, chocolatey goodness waiting to happen!
Wet Ingredients for Your Devil’s Food Cake
For that incredible moistness, you’ll need 1 cup of milk (any kind works!), 1/2 cup of vegetable oil, 2 large eggs (room temperature, please!), 1 teaspoon of alcohol-free vanilla extract, and 1 cup of boiling water. That hot water is our little secret for a super tender crumb!
Dry Ingredients for Your Devil’s Food Cake
Grab 2 cups of all-purpose flour, 1 3/4 cups of granulated sugar, 3/4 cup of unsweetened cocoa powder (use a good quality one!), 1 1/2 teaspoons of baking soda, 1 teaspoon of baking powder, and a solid 1 teaspoon of salt. These are the building blocks of our amazing cake!
Devil’s Food Cake Frosting Ingredients
Now, for the glorious frosting! You’ll need 1 cup of unsalted butter, softened to perfection, 3 1/2 cups of powdered sugar, 3/4 cup of unsweetened cocoa powder, 1/2 cup of milk, and 1 teaspoon of that lovely alcohol-free vanilla extract. Get ready for creamy, dreamy chocolate bliss!
How to Make Devil’s Food Cake: Step-by-Step Guide
Alright, bakers, this is the fun part! Making this Devil’s Food Cake is incredibly satisfying, and I’m going to walk you through every single step. Don’t be shy; just follow along, and you’ll have a show-stopping cake in no time. It’s truly easier than you think!
Preparing Your Devil’s Food Cake Batter
First things first, let’s get that oven ready! Preheat it to 350°F (175°C) so it’s nice and hot when your batter is done. Then, grab your two 9-inch round cake pans. Grease them really well, then dust with flour, tapping out any excess. This is crucial for easy release! In a big bowl, whisk together all your dry ingredients: flour, granulated sugar, cocoa powder, baking soda, baking powder, and salt. Make sure there are no lumps! Next, add the milk, vegetable oil, eggs, and alcohol-free vanilla extract to the dry mix. Beat this with your electric mixer on medium speed for about two minutes until everything is beautifully combined. Now for the secret weapon: carefully stir in the boiling water. The batter will be quite thin, almost soupy, but don’t worry, that’s exactly how it should be! It helps create that incredible moistness.
Baking Your Devil’s Food Cake
Now that your batter is perfect, pour it evenly into your prepared cake pans. Try to divide it as equally as possible for even baking. Pop them into your preheated oven and let them bake for about 30-35 minutes. You’ll know they’re done when a wooden skewer or toothpick inserted into the center comes out clean. If there’s still wet batter, give it a few more minutes. Resist the urge to open the oven door too often – we want that heat to stay put!
Crafting the Devil’s Food Cake Frosting
While your cakes are cooling, let’s get started on that luscious frosting! In a large bowl, beat your softened butter until it’s super creamy and light. This usually takes a couple of minutes with an electric mixer. Then, gradually add the powdered sugar and cocoa powder, alternating with the milk. Start on low speed so you don’t end up in a cocoa cloud! Beat until it’s wonderfully smooth, fluffy, and spreadable. Finally, stir in the alcohol-free vanilla extract. Give it a taste – pure chocolate bliss, right?
Assembling and Finishing Your Devil’s Food Cake
Patience is key here! Let your cakes cool in the pans for about 10 minutes. Then, carefully invert them onto a wire rack to cool completely. I mean COMPLETELY! A warm cake will melt your beautiful frosting. Once they’re cool, place one cake layer on your serving plate, spread a generous amount of frosting, then top with the second layer. Frost the top and sides of the cake, making it as rustic or as smooth as you like. Slice, serve, and watch those happy faces!
Tips for a Flawless Devil’s Food Cake
You’ve done all the hard work, now let’s make sure your Devil’s Food Cake is absolutely perfect! These little tricks are what I’ve picked up over the years to guarantee a show-stopping result every single time. Trust me, paying attention to these details will elevate your cake from good to truly unforgettable. No more dry cakes or lumpy frosting for you!
Ensuring a Moist Devil’s Food Cake
Don’t skip the boiling water – it’s crucial for that incredible moistness! Also, avoid overmixing the batter; this develops gluten and can make your cake tough. And whatever you do, don’t overbake it! Pull it from the oven as soon as the skewer comes out clean.
Perfecting Your Devil’s Food Cake Frosting
Make sure your butter is truly softened, but not melted, for the creamiest frosting. Sift your powdered sugar and cocoa powder to avoid lumps – seriously, it makes a huge difference! And add the milk gradually, a tablespoon at a time, until you reach your desired spreadable consistency.
Devil’s Food Cake: Storage and Serving Suggestions
You’ve put all that love into making this incredible Devil’s Food Cake, so let’s make sure it stays amazing and that you get to enjoy every last crumb! Proper storage is key, and I’ve got some fun ideas for serving it up that’ll make it feel extra special, even if it’s just for you and a cup of tea.
Storing Leftover Devil’s Food Cake
To keep your Devil’s Food Cake fresh, pop any leftovers into an airtight container. It’ll be perfectly happy at room temperature for up to 3 days, or you can stash it in the fridge for up to 5 days. Just make sure it’s covered!
Creative Devil’s Food Cake Serving Ideas
Beyond just a slice, try serving your Devil’s Food Cake with a scoop of vanilla bean ice cream, a dollop of fresh whipped cream, or even a sprinkle of raspberries for a touch of tartness. A little dusting of cocoa powder on top always looks elegant too!
Frequently Asked Questions About Devil’s Food Cake
Okay, I know you probably have a few questions buzzing around after all that talk about delicious Devil’s Food Cake! Don’t you worry, I’ve got you covered. Here are some of the most common questions I get about this gloriously rich chocolate dessert, along with my best advice. Let’s get these answered so you can bake with total confidence!
What makes this a Devil’s Food Cake?
Ah, the classic question! A Devil’s Food Cake is known for its incredibly rich, dark, and moist crumb, usually thanks to a higher proportion of cocoa and often baking soda which reacts with the cocoa to deepen the color and flavor. It’s truly a decadent chocolate cake!
Can I make this Devil’s Food Cake ahead of time?
Absolutely! This Devil’s Food Cake actually tastes even better the next day as the flavors meld. You can bake the layers, wrap them tightly, and store them at room temperature overnight, or freeze them for up to a month. Frost it closer to serving time!
How to adapt this Devil’s Food Cake for dietary needs?
While this recipe is vegetarian, you can try some swaps! For dairy-free, use a plant-based milk and butter alternative. For gluten-free, a 1:1 gluten-free flour blend might work, but results can vary, so test it out!
Estimated Devil’s Food Cake Nutritional Information
Alright, for those of you who like to keep an eye on what you’re eating (and let’s be honest, sometimes with a cake this good, we just don’t want to know!), here’s an estimated nutritional breakdown for one slice of this Devil’s Food Cake. Remember, these are just estimates and can vary based on exact ingredient brands and portion sizes. But hey, it’s a treat, right?
Share Your Devil’s Food Cake Creation
I absolutely can’t wait to see your incredible Devil’s Food Cake creations! Seriously, please share them with me! Leave a comment below, tell me how it turned out, or tag me on social media. Happy baking, my friends!
PrintSimple Devil’s Food Cake
This Devil’s Food Cake is a rich, moist chocolate cake with a creamy chocolate frosting. It’s a classic dessert for any occasion.
- Prep Time: 25 minutes
- Cook Time: 35 minutes
- Total Time: 1 hour 30 minutes
- Yield: 12 servings 1x
- Category: Dessert
- Method: Baking
- Cuisine: American
- Diet: Vegetarian
Ingredients
- 2 cups all-purpose flour
- 1 3/4 cups granulated sugar
- 3/4 cup unsweetened cocoa powder
- 1 1/2 teaspoons baking soda
- 1 teaspoon baking powder
- 1 teaspoon salt
- 1 cup milk
- 1/2 cup vegetable oil
- 2 large eggs
- 1 teaspoon vanilla extract
- 1 cup boiling water
- For the frosting:
- 1 cup unsalted butter, softened
- 3 1/2 cups powdered sugar
- 3/4 cup unsweetened cocoa powder
- 1/2 cup milk
- 1 teaspoon vanilla extract
Instructions
- Preheat oven to 350°F (175°C). Grease and flour two 9-inch round cake pans.
- In a large bowl, whisk together the flour, sugar, cocoa powder, baking soda, baking powder, and salt.
- Add the milk, vegetable oil, eggs, and vanilla extract to the dry ingredients. Beat with an electric mixer on medium speed until well combined, about 2 minutes.
- Carefully stir in the boiling water until the batter is smooth. The batter will be thin.
- Pour the batter evenly into the prepared cake pans.
- Bake for 30-35 minutes, or until a wooden skewer inserted into the center comes out clean.
- Let the cakes cool in the pans for 10 minutes, then invert them onto a wire rack to cool completely.
- To make the frosting: In a large bowl, beat the softened butter until creamy.
- Gradually add the powdered sugar and cocoa powder, alternating with the milk, beating until smooth and fluffy. Stir in the vanilla extract.
- Once the cakes are completely cool, frost as desired.
Notes
- For best results, use good quality cocoa powder.
- Make sure all ingredients are at room temperature for a smoother batter.
- Do not overmix the batter, as this can result in a dry cake.
- Store leftover cake in an airtight container at room temperature for up to 3 days, or in the refrigerator for up to 5 days.
Nutrition
- Serving Size: 1 slice
- Calories: 550
- Sugar: 70g
- Sodium: 350mg
- Fat: 28g
- Saturated Fat: 15g
- Unsaturated Fat: 10g
- Trans Fat: 0.5g
- Carbohydrates: 75g
- Fiber: 4g
- Protein: 6g
- Cholesterol: 70mg


