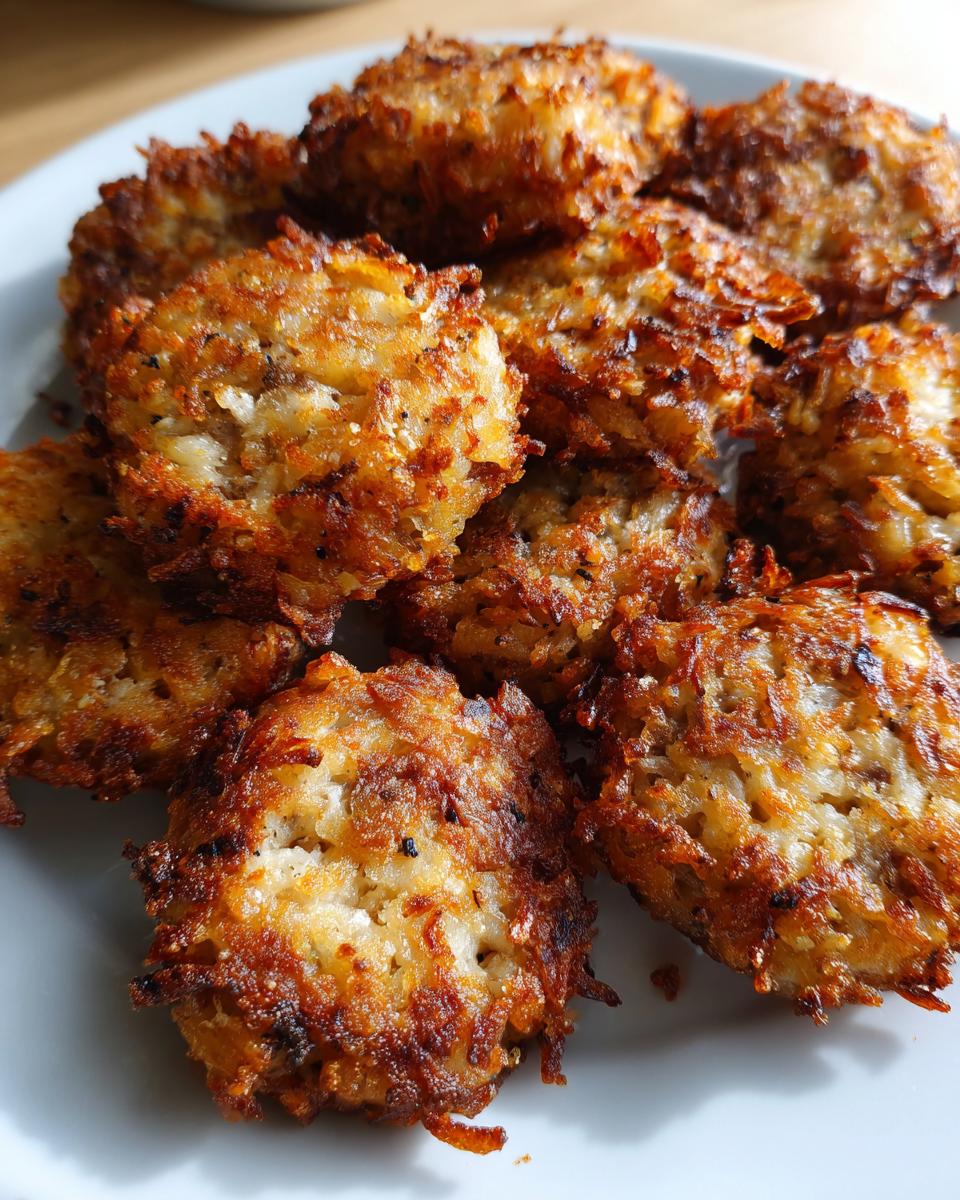
There’s nothing like that perfect crispy bite to start your morning right! These Crispy Hashbrown Sausage Bites have become my go-to weekend brunch miracle – they disappear faster than I can make them. I first whipped up a batch when my hungry cousins showed up unannounced, and now they’re my secret weapon for feeding crowds without fuss.
What makes them special? You get that irresistible crunch from golden hashbrowns hugging savory sausage, all ready in about 30 minutes flat. No fancy techniques, just simple ingredients transformed into little bites of breakfast magic.
Why You’ll Love These Crispy Hashbrown Sausage Bites
Listen, I know breakfast foods can be fussy, but these little bites? They’re the MVP of my kitchen for so many reasons:
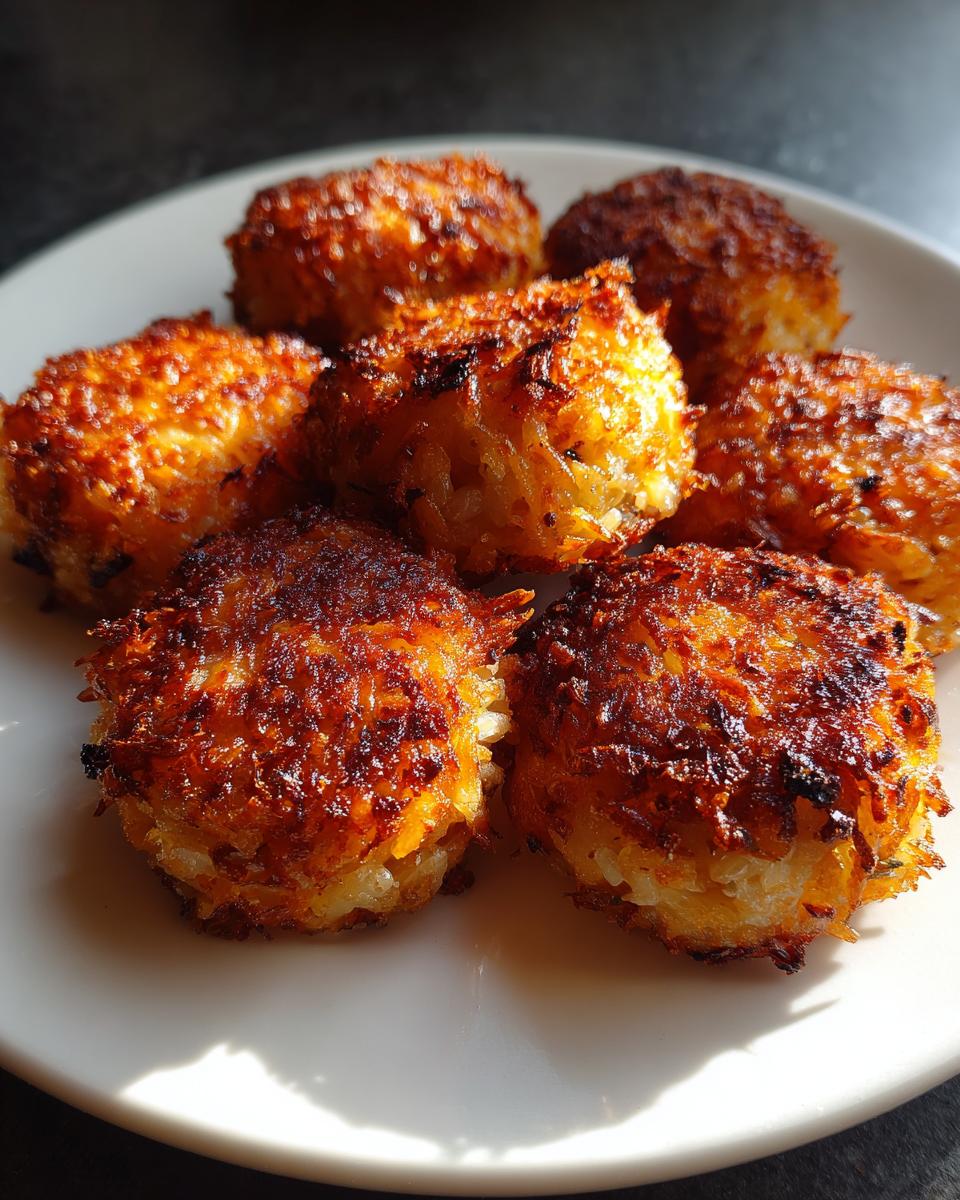
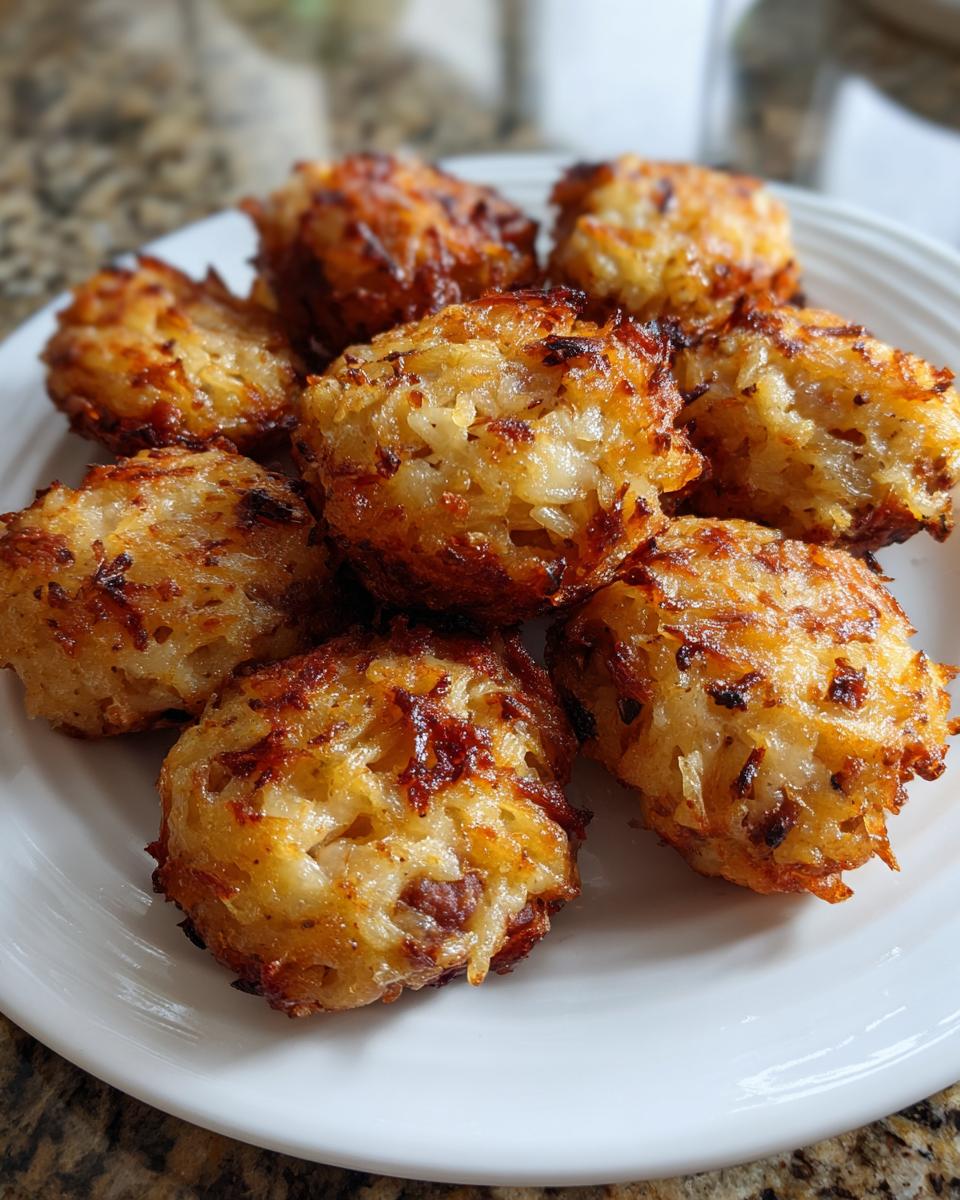
- That perfect crunch – The golden hashbrown exterior gives you that satisfying potato chip crispiness with every bite, while staying tender inside
- Ready in a flash – From bowl to table in 30 minutes flat (even when I’m still half-asleep on Sunday mornings)
- Crowd-pleasing magic – I’ve yet to meet someone who doesn’t go back for thirds – kids, foodies, and picky eaters alike
- Endlessly adaptable – Throw in some cheese, swap the meats, or spice ’em up – they’re like a blank canvas for your breakfast cravings
Ingredients for Crispy Hashbrown Sausage Bites
Here’s everything you’ll need to make these irresistible breakfast bites – trust me, it’s all about the simple but perfect combination here:
- 1 pound ground breakfast sausage – I always use the regular kind, but spicy sausage makes a fun twist if you like heat
- 2 cups shredded hashbrown potatoes (thawed) – This is key! Frozen ones straight from the freezer will make your mixture too wet
- 1/4 cup grated onion (finely grated) – Don’t skip this! It adds moisture and sweetness without crunchy onion chunks
- 1/4 cup all-purpose flour – Just enough to bind everything together without making them doughy
- 1 egg – Our trusty binder that holds all these goodies together
- 1/2 teaspoon salt – Because properly seasoned sausage bites are everything
- 1/4 teaspoon black pepper – Freshly ground if you’ve got it
- 2 tablespoons vegetable oil – For getting that gorgeous golden crust
See? Nothing fancy – just pantry staples that come together to make something magical. I always double check my hashbrowns are thawed and my onions are grated fine before starting – it makes all the difference in texture!
Equipment You’ll Need
Don’t worry – you don’t need any fancy gadgets for these crispy bites! Just grab these basic kitchen tools (I bet you already have most of them):
- A good ol’ skillet – My trusty cast iron works best for that perfect browning, but any heavy-bottomed pan will do
- Baking sheet – For finishing them off in the oven (line it with parchment if you’re feeling lazy about cleanup like me)
- Mixing bowl – Medium-sized so you’ve got room to really combine everything without spilling
- Measuring cups & spoons – Because eyeballing the flour never works out for me
- Cookie scoop or spoon – Makes forming those uniform 1-inch balls a breeze (but clean hands work too!)
That’s it! No stand mixers, no special equipment – just simple tools for simple (but seriously delicious) breakfast bites.
How to Make Crispy Hashbrown Sausage Bites
Alright, friends – here’s where the magic happens! Making these crispy bites is easier than you think, but I’ve got some little tricks that take them from good to “Oh-my-gosh-can-I-have-the-recipe” amazing. Follow these steps and you’ll be golden (literally)!
Step 1: Preheat and Mix
First things first – crank that oven to 400°F (200°C). Trust me, you want it nice and hot when those bites go in later! While it’s heating up, let’s make our magical mixture:
Grab your mixing bowl and toss in all the goodies – sausage, thawed hashbrowns, grated onion, flour, egg, salt, and pepper. Now here’s my secret: use your hands (yes, really!) to mix everything together just until combined. You don’t want to overwork it – stop when you don’t see any dry flour patches. The mixture should hold together when pinched but still feel loose enough to scoop.
Step 2: Shape and Brown
Heat your oil in the skillet over medium heat – it should shimmer but not smoke. While that’s heating, roll the mixture into 1-inch balls (about the size of a ping pong ball). Pro tip: wet your hands slightly to prevent sticking!
When your oil’s ready, carefully add the balls in batches – don’t crowd the pan! Let them sizzle untouched for about 3 minutes until you see that gorgeous golden crust forming underneath. Give them a gentle roll to brown all sides evenly. Oh, that sound? That’s the sound of crispy perfection happening!
Step 3: Bake to Perfection
Transfer your browned beauties to a baking sheet (no need to grease it if you used parchment like I suggested earlier). Pop them in your preheated oven for exactly 10 minutes. This final bake makes sure the sausage cooks through while keeping those hashbrowns crispy-crunchy.
When they emerge golden brown and smelling like breakfast heaven, resist eating one immediately (trust me, they’re molten lava hot!). Let them sit for just 2 minutes – it helps them firm up so they don’t fall apart when you bite into them. Then dig in!
Tips for Perfect Crispy Hashbrown Sausage Bites
Listen, I’ve made enough batches of these crispy bites to know exactly what makes them turn out amazing versus just “meh.” Here are my hard-earned tricks for hashbrown sausage bite perfection:
1. Thaw those hashbrowns completely – I know, I know, impatience gets the best of me too. But frozen shreds will make your mixture watery and sad. Spread them on a paper towel while you prep other ingredients to soak up excess moisture. The difference in texture is night and day!
2. Watch your oil like a hawk – Too cold and your bites will soak up oil instead of crisping. Too hot and they’ll burn before cooking through. Test with a tiny bit of mixture – it should sizzle gently when it hits the pan. Adjust the heat as needed between batches.
3. Give them breathing room! The biggest rookie mistake? Stuffing the skillet full. Crowded bites steam instead of brown. I do 8-10 at a time in my 12-inch skillet – it’s worth the extra few minutes for that perfect golden crust all around.
Bonus tip from my last brunch disaster: Don’t skip the resting time after baking! Those 2 minutes let the bites firm up so they hold together when you bite into them. (Yes, I learned this the hard way with molten sausage on my favorite shirt.)
Variations for Crispy Hashbrown Sausage Bites
One of the best things about these little bites? They’re like a blank canvas for your breakfast creativity! Here are my favorite ways to mix things up when I’m feeling adventurous (or just cleaning out the fridge):
The Cheese Lover’s Dream: Fold in 1/2 cup of shredded sharp cheddar right into the mixture – the melty pockets take these to another level. For extra cheesiness, I’ll sometimes sprinkle a little extra on top before baking. (Pro tip: The drier cheeses like parmesan work better mixed in, while softer ones like mozzarella are perfect for stuffing inside!)
Turkey Swap: My health-conscious sister swears by swapping the regular sausage for ground turkey sausage. You’ll miss a tiny bit of richness, but adding 1/4 teaspoon each of sage and fennel seeds mimics that classic breakfast sausage flavor beautifully. Just watch the baking time – turkey versions cook slightly faster.
Spice It Up: For those mornings when you need an extra kick, I’ll mix in 1/4 teaspoon of cayenne pepper and a diced jalapeño (seeds removed if you’re not crazy like me). The heat sneaks up on you after that initial crispy crunch – perfect with a cooling ranch dip on the side. My husband calls these his “weekend wake-up call” version.
Serving Suggestions
Now here’s the fun part – how to serve these crispy bites to make them shine! I’ve thrown enough brunches to know presentation is everything. Let me share my favorite ways to turn these from simple bites into a showstopping spread.
Dips That Steal the Show: A good dip takes these from great to “can’t-stop-eating” amazing. My go-tos are:
- Cool Ranch – The creamy tang cuts through the richness perfectly. I doctor mine up with extra dill and a squeeze of lemon
- Spicy Ketchup – Just mix your favorite ketchup with a dash of hot sauce and pinch of smoked paprika
- Honey Mustard – Equal parts yellow mustard and honey with a splash of apple cider vinegar
I always serve these in small bowls right next to the warm bites – watching guests do the “dip-and-bite” dance is half the fun!
Breakfast Pairings That Work Magic: When I’m doing a full spread, these are my perfect partners:
- Fluffy Scrambled Eggs – The creamy eggs and crispy bites are match made in breakfast heaven
- Fresh Fruit Salad – The sweetness balances the savory perfectly. My combo? Melon balls, berries, and grapes
- Simple Green Salad – Just baby greens with lemon vinaigrette cuts the richness
For big brunches, I’ll arrange everything on a big platter with the bites in the center – it looks fancy but took me 30 minutes flat. My kind of entertaining!
Presentation Pro Tip: Skip the boring plate! I serve these in a warm cast iron skillet right from the oven (with trivectors, of course) or on a wooden board with the dips in little mason jars. Throw some fresh herbs on top – chives or parsley add that “chef’s kiss” touch. Suddenly your simple bites look straight from a breakfast bistro!
Storage and Reheating
Here’s the good news – these crispy bites are almost as good reheated as they are fresh! (I say “almost” because let’s be real, nothing beats straight-from-the-oven crunch.) But with my tried-and-true methods, you can enjoy them for days without losing that magic texture.
Fridge Storage: Let your leftover bites cool completely – I spread them in a single layer on a plate for about 20 minutes first. Then pop them in an airtight container with a paper towel underneath (this soaks up any excess moisture). They’ll keep beautifully for 3 days in the fridge, though in my house they never last that long!
Freezing Like a Pro: These are freezer champions! Arrange cooled bites on a parchment-lined baking sheet and freeze solid (about 1 hour). Then transfer to a freezer bag, squeezing out all the air. They’ll keep for 2 months this way. No need to thaw before reheating – just add an extra minute or two to the cooking time.
Reheating for Maximum Crisp:
- Oven Method (My Favorite): Preheat to 375°F. Arrange bites on a rack over a baking sheet and bake for 5-7 minutes until hot and crispy again. The rack lets air circulate so they don’t get soggy bottoms!
- Air Fryer Magic: 350°F for 3-4 minutes gives you near-perfect results. Shake the basket halfway through – they come out like they’re freshly made!
- Microwave in a Pinch: 30 seconds gives you warm bites, but lose the crunch. I’ll sometimes microwave then give them a quick 1-minute broil to crisp up.
Truth time – I always make a double batch just to have these ready for quick breakfasts. My teenage son grabs them straight from the fridge and calls them “breakfast meatballs” (don’t tell him they’re actually balanced!).
Nutritional Information
Let’s talk numbers, friends! While I’m usually all about flavor over counting calories, I know some of you like to keep track (or have dietary needs to consider). Here’s the scoop on what you’re getting in these crispy bites – just remember these are estimates since ingredients can vary:
Per serving (3 bites):
- Calories: 210
- Total Fat: 15g (4g saturated, 9g unsaturated)
- Cholesterol: 45mg
- Sodium: 420mg
- Total Carbohydrates: 10g
- Fiber: 1g
- Sugar: 1g
- Protein: 8g
A few things to note: these numbers are based on using regular pork breakfast sausage and vegetable oil. If you use turkey sausage like I sometimes do, you’ll shave off about 30 calories and 3g fat per serving (but honestly, I usually go for the full-flavor version – life’s too short!).
Personally, I think these make a pretty balanced little breakfast – you’re getting protein from the sausage and egg, some carbs for energy from the hashbrowns, and just enough fat to keep you satisfied. Not bad for something that tastes like a crispy little indulgence!
Frequently Asked Questions
After making these crispy hashbrown sausage bites for every brunch gathering under the sun, I’ve heard all the questions! Here are the answers to the ones that pop up most often (plus some hard-won wisdom from my kitchen mishaps):
Can I freeze these sausage bites?
Absolutely! In fact, I always stash a batch in my freezer for emergency breakfasts. Just let them cool completely, then freeze in a single layer on a baking sheet before transferring to freezer bags. They’ll keep beautifully for 2 months. When you’re ready, reheat them straight from frozen in a 375°F oven for about 10 minutes – they come out nearly as crispy as fresh!
Can I use fresh potatoes instead of hashbrowns?
I’ve tried this when I was out of hashbrowns (desperate times, right?). You’ll need to shred and squeeze the potatoes really well to remove excess moisture. Honestly? The texture isn’t quite the same – the frozen hashbrowns have just the right starch content for that perfect crisp. But in a pinch, 2 cups of freshly grated russet potatoes (wrung out in a clean towel) will work. Just add an extra tablespoon of flour to help bind them.
How do I prevent sticking when browning?
Oh boy, my first batch stuck like glue – lesson learned! First, make sure your oil is properly heated before adding bites (test with a small piece of mixture – it should sizzle gently). Second, don’t move them around too soon – let that golden crust form naturally (about 2 minutes) before gently turning. My secret weapon? A thin metal spatula (not plastic!) gets right under them without breaking. If you’re still nervous, a well-seasoned cast iron skillet is practically non-stick magic!
30-Minute Crispy Hashbrown Sausage Bites That Wow

Crispy hashbrown sausage bites are a delicious breakfast or snack option. They combine savory sausage with golden hashbrowns for a satisfying crunch.
- Prep Time: 15 minutes
- Cook Time: 15 minutes
- Total Time: 30 minutes
- Yield: 24 bites 1x
- Category: Breakfast
- Method: Pan-fry and Bake
- Cuisine: American
- Diet: Low Lactose
Ingredients
- 1 pound ground breakfast sausage
- 2 cups shredded hashbrown potatoes
- 1/4 cup grated onion
- 1/4 cup all-purpose flour
- 1 egg
- 1/2 teaspoon salt
- 1/4 teaspoon black pepper
- 2 tablespoons vegetable oil
Instructions
- Preheat oven to 400°F
- Mix sausage, hashbrowns, onion, flour, egg, salt and pepper in a bowl
- Shape mixture into 1-inch balls
- Heat oil in skillet over medium heat
- Brown bites on all sides, about 3 minutes
- Transfer to baking sheet
- Bake for 10 minutes until fully cooked
Notes
- Use thawed hashbrowns for best results
- Can substitute turkey sausage for lower fat
- Serve with dipping sauces if desired
Nutrition
- Serving Size: 3 bites
- Calories: 210
- Sugar: 1g
- Sodium: 420mg
- Fat: 15g
- Saturated Fat: 4g
- Unsaturated Fat: 9g
- Trans Fat: 0g
- Carbohydrates: 10g
- Fiber: 1g
- Protein: 8g
- Cholesterol: 45mg


