Oh my goodness, friends, gather ’round! Today, we’re diving headfirst into one of my absolute favorite, most iconic desserts: the Boston Cream Pie! This isn’t just a cake; it’s a legend, a fluffy vanilla dream filled with luscious pastry cream and crowned with a shiny chocolate glaze that just screams “eat me!” Every time I make a Boston Cream Pie, it takes me right back to my childhood, to those special occasions when my Aunt Carol would bring one to family gatherings. It was always the first dessert to disappear, and for good reason! That perfect balance of tender cake, rich cream, and decadent chocolate? Pure magic!
You might think making a Boston Cream Pie at home is a huge undertaking, but trust me, it’s totally doable and so incredibly rewarding. This recipe is going to be your new go-to. It breaks down all the steps, making it super approachable, even if you’re new to making pastry cream from scratch. Get ready to impress everyone (and yourself!) with this classic American beauty!

Why You’ll Love This Boston Cream Pie Recipe
Okay, so why *this* Boston Cream Pie recipe? Because it’s not just delicious, it’s a joy to make and even more joyful to eat! I’ve tweaked it over the years to make sure it’s super reliable and gives you that perfect, nostalgic taste every single time. You’ll absolutely adore it because:
- It’s surprisingly straightforward. Don’t let the layers intimidate you!
- The flavors are just incredible – a perfect harmony of vanilla, rich cream, and chocolate.
- It’s a showstopper! Perfect for holidays, birthdays, or just a fancy Tuesday night.
- You’ll get bragging rights for making such a classic from scratch!
The Allure of a Classic Boston Cream Pie
There’s just something so comforting and elegant about a Boston Cream Pie, isn’t there? It’s a dessert that feels special without being fussy. The tender cake, the silky-smooth cream, and that glossy chocolate topping create a symphony of textures and tastes that just can’t be beat. It’s a timeless treat that always brings a smile.
Essential Equipment for Your Boston Cream Pie
Alright, before we get our hands messy with all that delicious batter and cream, let’s talk tools! Having the right equipment makes all the difference, trust me. You don’t need a professional kitchen, but a few key items will make your Boston Cream Pie journey smooth sailing. You’ll definitely want a couple of good mixing bowls – one large for the cake batter and a medium one for dry ingredients. A whisk, a rubber spatula, and an electric mixer (handheld or stand mixer, either works!) are also your best friends here. And don’t forget a saucepan for that dreamy pastry cream and chocolate glaze!
Baking Pans for the Perfect Boston Cream Pie
For those perfectly symmetrical layers, you’ll need two 8-inch round cake pans. Make sure they’re the same size so your Boston Cream Pie stacks up beautifully!
Ingredients for the Best Boston Cream Pie
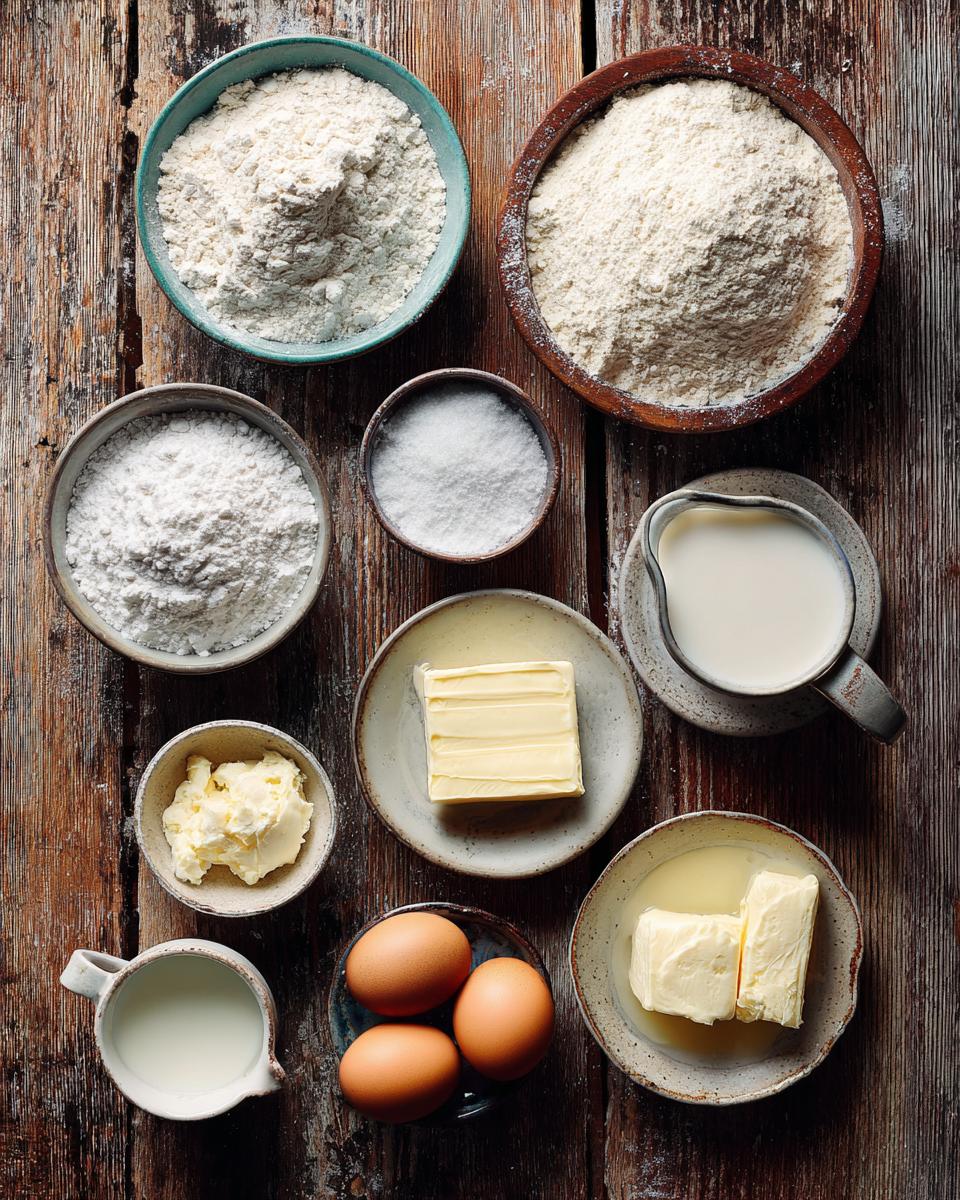
Okay, let’s get down to the nitty-gritty – the ingredients! This list might look a little long, but trust me, each item plays a super important role in making our Boston Cream Pie absolutely perfect. We’re talking about simple, good-quality stuff that you probably already have in your pantry or can easily grab at the store. Freshness really makes a difference here, especially for those eggs and that milk. So, grab your shopping list, and let’s make sure we have everything ready to go for our delicious adventure!
- 1 1/2 cups all-purpose flour
- 1 1/2 teaspoons baking powder
- 1/2 teaspoon salt
- 1/2 cup unsalted butter, softened
- 1 cup granulated sugar
- 2 large eggs
- 1 teaspoon alcohol-free vanilla extract
- 1/2 cup milk
- 2 cups milk (for pastry cream)
- 1/2 cup granulated sugar (for pastry cream)
- 1/4 cup cornstarch
- 3 large egg yolks
- 1 teaspoon alcohol-free vanilla extract (for pastry cream)
- 4 ounces bittersweet chocolate, chopped
- 1/2 cup heavy cream
- 1 tablespoon unsalted butter (for glaze)
Key Ingredients for a Tender Boston Cream Pie Cake
For the cake layers, we’re keeping it classic and simple. You’ll need all-purpose flour, baking powder for that perfect lift, and a pinch of salt to balance the sweetness. The unsalted butter, granulated sugar, and large eggs are key for that rich, tender crumb. Oh, and please, *please* make sure your butter and eggs are at room temperature! It makes a huge difference in how smoothly everything creams together, giving you the lightest, fluffiest cake base for our Boston Cream Pie.
Crafting the Creamy Filling and Glaze for Your Boston Cream Pie
Now for the good stuff – the creamy filling and the shiny glaze! For the pastry cream, we’ll use milk (a good amount!), granulated sugar, cornstarch to thicken it up, and those beautiful egg yolks for richness. Another splash of alcohol-free vanilla extract makes it sing! For the show-stopping chocolate glaze, you’ll want some good quality bittersweet chocolate, chopped up so it melts beautifully, heavy cream, and a touch of unsalted butter for that luscious sheen. It’s going to be divine!
How to Make Boston Cream Pie: Step-by-Step Instructions
Alright, my friends, this is where the magic really happens! Don’t be intimidated by the different components of this Boston Cream Pie; I’m going to walk you through each step, making it super easy and fun. We’ll tackle the cake layers first, then the dreamy pastry cream, and finally, that gorgeous chocolate glaze and assembly. Just take it one step at a time, and you’ll have a show-stopping dessert that tastes like it came straight from a fancy bakery!
Baking the Golden Boston Cream Pie Cake Layers
First up, let’s get those beautiful cake layers baking! You’ll want to preheat your oven to 350°F (175°C) and then grease and flour your two 8-inch round cake pans really well. This is super important for easy release! In a medium bowl, whisk together your flour, baking powder, and salt. Set that aside. Now, in a large bowl, cream together your softened butter and granulated sugar until it’s light and fluffy – this usually takes a few minutes with an electric mixer. Beat in your eggs one at a time, making sure each is fully incorporated before adding the next, then stir in the alcohol-free vanilla. Now for the dry and wet: gradually add the dry ingredients to the wet, alternating with the 1/2 cup of milk. Start and end with the dry ingredients, mixing *just* until combined. Seriously, don’t overmix, or your cake will be tough! Divide the batter evenly between your prepared pans and bake for about 25-30 minutes, or until a wooden skewer comes out clean. Let them cool in the pans for 10 minutes, then invert onto a wire rack to cool completely. Patience, young padawan!
Preparing the Velvety Pastry Cream for Boston Cream Pie
While your cakes are cooling, let’s make that luscious pastry cream. This is the heart of your Boston Cream Pie! In a saucepan, combine 2 cups of milk and 1/2 cup of granulated sugar. Heat this over medium heat, stirring until the sugar dissolves and it just starts to simmer. Don’t let it boil vigorously! In a separate bowl, whisk together the cornstarch and egg yolks until they’re smooth. Now, here’s the trick: gradually whisk about half of that hot milk mixture into your egg yolk mixture. This tempers the yolks so they don’t scramble – nobody wants scrambled eggs in their dessert! Pour this warmed egg yolk mixture back into the saucepan with the remaining hot milk. Cook over medium heat, whisking constantly, until the cream thickens beautifully and comes to a gentle boil. Let it boil for just 1 minute, then remove it from the heat and stir in the alcohol-free vanilla. Pour the pastry cream into a clean bowl, then immediately press plastic wrap directly onto the surface to prevent a skin from forming. Pop it in the fridge until it’s completely chilled, about 2 hours. Seriously, don’t rush this part; cold pastry cream is key!
Assembling and Glazing Your Boston Cream Pie
Okay, the moment of truth! Once your cakes are completely cool and your pastry cream is perfectly chilled, it’s time to assemble your Boston Cream Pie. Grab one cake layer and place it on your serving plate. Spread that glorious, chilled pastry cream evenly over the cake. Don’t be shy! Then, carefully place the second cake layer on top. Now for the chocolate glaze! Combine your chopped bittersweet chocolate, heavy cream, and 1 tablespoon of unsalted butter in a heatproof bowl set over a saucepan of simmering water (a double boiler is your friend here!). Stir until everything is melted and beautifully smooth. Remove it from the heat. Pour the warm, glossy chocolate glaze over the top of your cake, letting it drip down the sides in a gorgeous cascade. Don’t worry if it’s not perfect; the drips are part of its charm! Finally, pop your Boston Cream Pie into the fridge for at least 30 minutes to allow that glaze to set up nicely before you slice into it. You’ve earned this, chef!
Pro Tips for a Flawless Boston Cream Pie
You’ve done all the hard work, now let’s make sure your Boston Cream Pie is absolutely perfect! I’ve picked up a few little tricks over the years that really elevate this dessert from “good” to “OMG, you HAVE to try this!” Pay attention to these details, and you’ll be serving up a flawless, bakery-worthy Boston Cream Pie every single time. These tips will help you avoid common pitfalls and ensure your cake is as delicious as it looks!
Achieving the Perfect Boston Cream Pie Texture
To get that tender, melt-in-your-mouth cake, always make sure your butter and eggs are at room temperature. Creaming them until light and fluffy incorporates air, and when adding dry and wet ingredients, mix *just* until combined to avoid overworking the gluten. Trust me on this!
Boston Cream Pie: Storage and Serving Suggestions
Okay, so you’ve made this incredible Boston Cream Pie, probably eaten a slice (or two, no judgment!), and now you’re wondering how to keep it fresh. Good news! This cake actually holds up beautifully. I always recommend serving it slightly chilled, straight from the fridge. The pastry cream is firm, the cake is tender, and the chocolate glaze has that perfect snap. It’s truly a delight!
Keeping Your Boston Cream Pie Fresh
To keep your Boston Cream Pie tasting its best, store it covered in the refrigerator. An airtight cake dome or plastic wrap works wonders. It’ll stay fresh and delicious for about 3-4 days – if it lasts that long!
Frequently Asked Questions About Boston Cream Pie
I get a lot of questions about making Boston Cream Pie, and I love helping fellow home bakers! So, I’ve put together some answers to the most common queries. Don’t let anything hold you back from making this incredible dessert!
Common Queries About Making Boston Cream Pie
Q: Can I make Boston Cream Pie ahead of time? Yes, absolutely! You can bake the cake layers a day in advance, wrap them tightly, and store them at room temperature. The pastry cream can also be made a day ahead and chilled. Assemble the Boston Cream Pie a few hours before you plan to serve it, allowing the glaze to set.
Q: How do I prevent my pastry cream from being lumpy? The key is constant whisking! When you’re cooking the pastry cream, keep whisking to prevent lumps. Also, make sure to temper your egg yolks properly by gradually adding hot milk to them before combining with the rest of the milk. Pressing plastic wrap directly on the surface while chilling also helps.
Q: My chocolate glaze is too thick/thin. What do I do? If your chocolate glaze is too thick, gently reheat it over a double boiler and add a tiny bit more heavy cream, a teaspoon at a time, until it reaches the desired consistency. If it’s too thin, you can try adding a bit more chopped chocolate and stirring until melted and smooth.
Estimated Boston Cream Pie Nutritional Information
Okay, I know some of you are curious about the numbers, so here’s a quick peek at the estimated nutritional info for a single slice of this delicious Boston Cream Pie. Remember, these are just estimates and can totally vary depending on the exact brands you use and how big your slice is (no judgment if it’s a generous one!).
- Serving Size: 1 slice
- Calories: 450
- Sugar: 45g
- Sodium: 200mg
- Fat: 25g
- Saturated Fat: 15g
- Unsaturated Fat: 8g
- Trans Fat: 0.5g
- Carbohydrates: 50g
- Fiber: 2g
- Protein: 7g
- Cholesterol: 120mg
Boston Cream Pie

Boston Cream Pie features layers of tender vanilla sponge cake filled with a rich pastry cream and topped with a shiny chocolate glaze.
- Prep Time: 45 minutes
- Cook Time: 40 minutes
- Total Time: 3 hours 25 minutes
- Yield: 8-10 servings 1x
- Category: Dessert
- Method: Baking
- Cuisine: American
- Diet: Vegetarian
Ingredients
- 1 1/2 cups all-purpose flour
- 1 1/2 teaspoons baking powder
- 1/2 teaspoon salt
- 1/2 cup unsalted butter, softened
- 1 cup granulated sugar
- 2 large eggs
- 1 teaspoon vanilla extract
- 1/2 cup milk
- 2 cups milk
- 1/2 cup granulated sugar
- 1/4 cup cornstarch
- 3 large egg yolks
- 1 teaspoon vanilla extract
- 4 ounces bittersweet chocolate, chopped
- 1/2 cup heavy cream
- 1 tablespoon unsalted butter
Instructions
- Preheat oven to 350°F (175°C). Grease and flour two 8-inch round cake pans.
- In a medium bowl, whisk together flour, baking powder, and salt.
- In a large bowl, cream together butter and 1 cup sugar until light and fluffy. Beat in eggs one at a time, then stir in 1 teaspoon vanilla extract.
- Gradually add dry ingredients to the wet ingredients, alternating with 1/2 cup milk, beginning and ending with dry ingredients. Mix until just combined.
- Divide batter evenly between prepared pans. Bake for 25-30 minutes, or until a wooden skewer inserted into the center comes out clean. Let cakes cool in pans for 10 minutes, then invert onto a wire rack to cool completely.
- For the pastry cream, combine 2 cups milk and 1/2 cup sugar in a saucepan over medium heat. Bring to a simmer, stirring until sugar dissolves.
- In a separate bowl, whisk together cornstarch and egg yolks until smooth.
- Gradually whisk about half of the hot milk mixture into the egg yolk mixture. Pour the egg yolk mixture back into the saucepan with the remaining hot milk.
- Cook over medium heat, whisking constantly, until the cream thickens and comes to a boil. Boil for 1 minute, then remove from heat. Stir in 1 teaspoon vanilla extract.
- Pour pastry cream into a clean bowl, cover the surface directly with plastic wrap to prevent a skin from forming, and refrigerate until completely chilled, about 2 hours.
- For the chocolate glaze, combine chopped chocolate, heavy cream, and 1 tablespoon butter in a heatproof bowl set over a saucepan of simmering water (double boiler). Stir until melted and smooth. Remove from heat.
- To assemble, place one cake layer on a serving plate. Spread the chilled pastry cream evenly over the cake. Top with the second cake layer.
- Pour the warm chocolate glaze over the top of the cake, allowing it to drip down the sides.
- Refrigerate for at least 30 minutes to allow the glaze to set before serving.
Notes
- Ensure all ingredients are at room temperature for best cake texture.
- Do not overmix the cake batter, as this can lead to a tough cake.
- The pastry cream needs to be completely chilled before assembly.
- If the chocolate glaze becomes too thick, gently reheat it over a double boiler.
Nutrition
- Serving Size: 1 slice
- Calories: 450
- Sugar: 45g
- Sodium: 200mg
- Fat: 25g
- Saturated Fat: 15g
- Unsaturated Fat: 8g
- Trans Fat: 0.5g
- Carbohydrates: 50g
- Fiber: 2g
- Protein: 7g
- Cholesterol: 120mg


