You know those mornings when you’re scrambling for a breakfast that’s actually good for you? Yeah, I’ve been there too. After one too many rushed protein shakes, I finally cracked the code for a morning game-changer – these Baked Protein Pancake Bowls. They’re my secret weapon for busy weeks when I need a high-protein breakfast that’ll keep me full till lunch.
I’ll never forget the first time I pulled these golden little beauties out of the oven. My kitchen smelled like Saturday mornings, but with half the work and twice the protein. The best part? You can make a batch on Sunday and have breakfast ready all week. No standing over a griddle flipping pancakes before coffee – just grab, heat, and go.
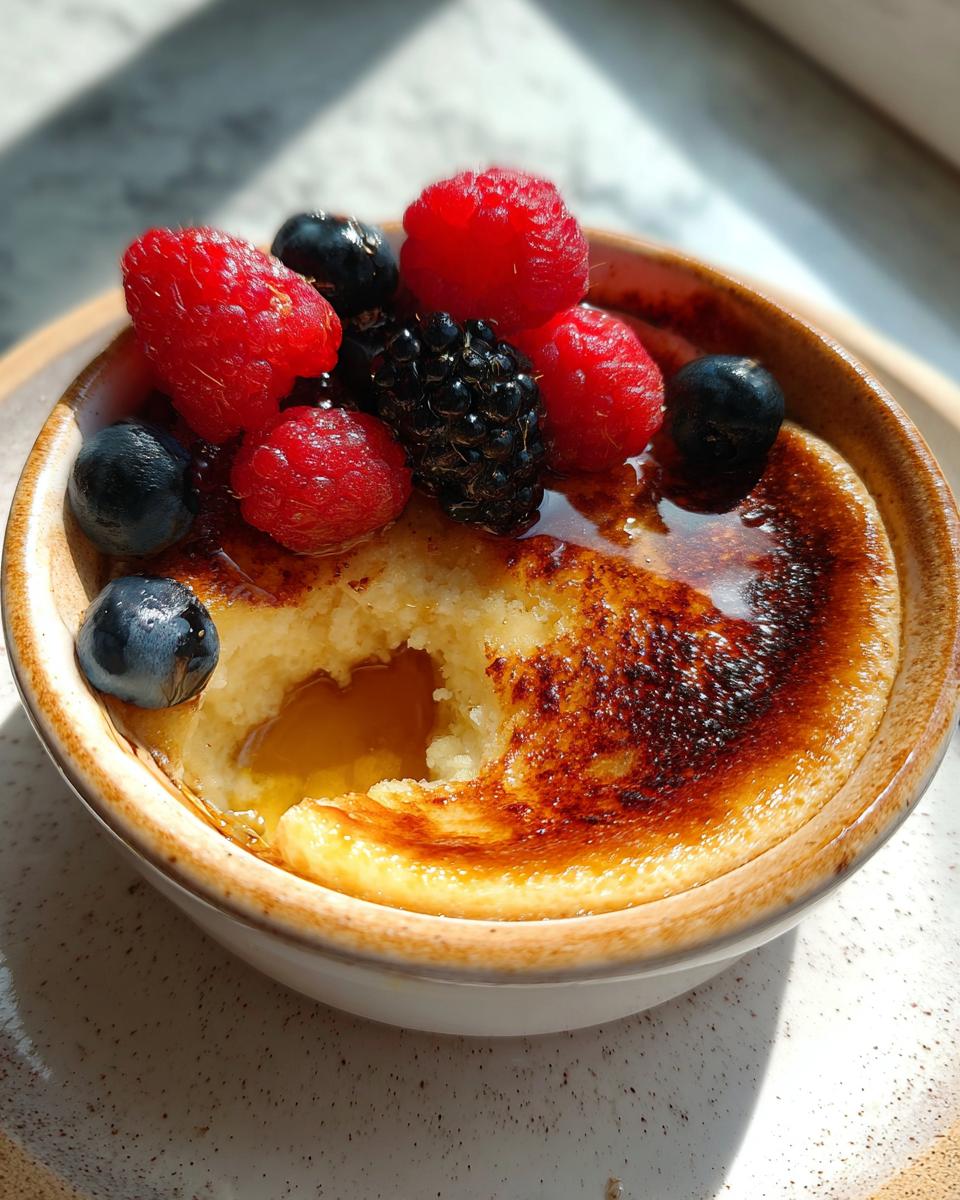
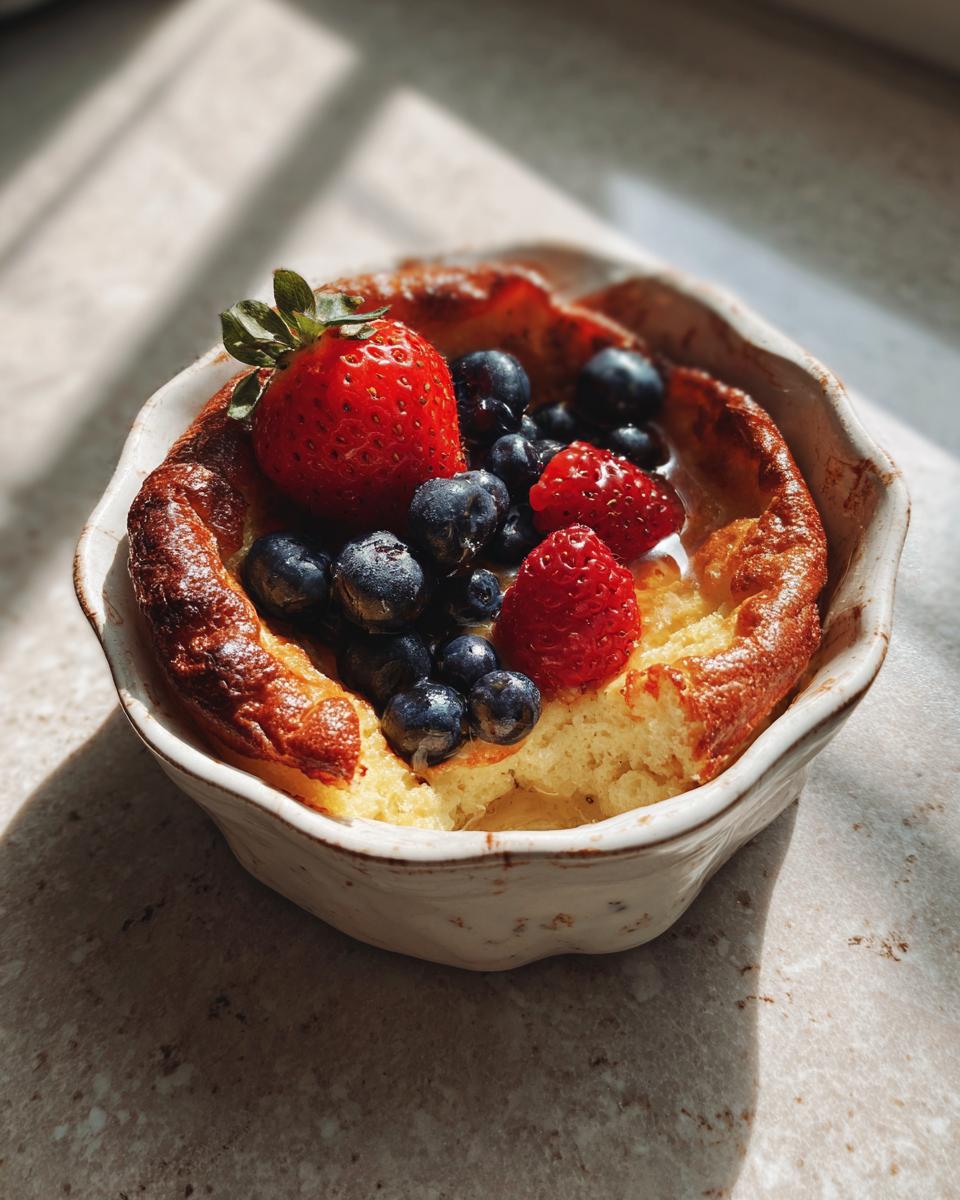
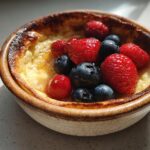
These aren’t your average pancakes either. With 18g of protein per serving and endless topping options, they’re the kind of breakfast that makes you feel like you’ve got your life together. My kids go crazy for them with berries and syrup, while I love mine with almond butter and chia seeds. However you top them, they’re the perfect mix of healthy and delicious.
Why You’ll Love These Baked Protein Pancake Bowls
Let me tell you why these little bowls of joy have become my breakfast obsession:
- Quick as a wink: Mix everything in one bowl, pop them in the oven, and you’re done. Faster than waiting in line at a coffee shop!
- Protein powerhouse: With 18g per serving, these will keep you full way longer than regular pancakes (no 10am stomach growling here).
- Totally customizable: Change up the flavors with different protein powders or toppings – I’ve made chocolate chip, blueberry, even pumpkin spice versions!
- Meal prep magic: They stay perfect in the fridge all week. Just grab and reheat when morning chaos hits.
- Kid-approved: My picky eaters think they’re getting dessert for breakfast (shh, don’t tell them it’s healthy).
Seriously, once you try these, you’ll wonder how you ever survived on toast or cereal.
Ingredients for Baked Protein Pancake Bowls
Here’s what you’ll need to make these protein-packed beauties – I promise it’s all simple stuff you probably have already:
- 1 cup oat flour (just blend oats if you don’t have flour – I do this all the time!)
- 1 scoop vanilla protein powder (about 30g – my favorite is whey but plant-based works too)
- 1 tsp baking powder (make sure it’s fresh – tap the canister first like Grandma taught you)
- 1/2 cup Greek yogurt (full-fat gives the best texture but low-fat works in a pinch)
- 1/4 cup milk (any kind you like – I’ve used almond, oat, even water when desperate!)
- 1 egg (room temp blends better – just set it out while you gather other ingredients)
- 1 tbsp honey (or maple syrup if you’re feeling fancy)
- 1/2 tsp vanilla extract (the real stuff – imitation just doesn’t hit the same)
See? Nothing weird or hard to find. Now let’s turn these into breakfast magic!
Equipment Needed
You won’t need any fancy gadgets for these baked protein pancake bowls – just basic kitchen staples:
- Mixing bowl (I use my favorite chipped ceramic one – perfection is overrated)
- Muffin tin or small oven-safe bowls (ramekins work great if you want that “bowl” shape)
- Measuring cups and spoons (eyeballing works, but I’ve learned my lesson the sticky way)
- Whisk or fork (no stand mixer needed – this batter comes together in seconds)
That’s it! Now let’s get mixing.
How to Make Baked Protein Pancake Bowls
Okay, let’s turn these simple ingredients into the easiest breakfast you’ll make all week. Trust me, once you get the hang of this method, you’ll be whipping up batches in your sleep!
Step 1: Prep the Dry Ingredients
First things first – preheat that oven to 350°F (175°C). While it’s heating up, grab your oat flour, protein powder, and baking powder. Now here’s my little trick: whisk them together really well in your mixing bowl. If your oat flour is looking clumpy (mine always is), just sift it through your fingers as you add it. This ensures no sneaky flour lumps end up in your final batter.
Step 2: Mix the Wet Ingredients
In another bowl (or right in your measuring cup to save dishes – I won’t tell), combine the Greek yogurt, milk, egg, honey, and vanilla. Whisk until it’s silky smooth – you shouldn’t see any streaks of yogurt or egg. The consistency should be like a thin pancake batter at this point. Now pour your wet mixture into the dry ingredients and stir gently. Some small lumps are fine – overmixing makes tough pancakes!
Step 3: Bake to Perfection
Grease your muffin tins or small bowls really well (these babies like to stick!). Fill each cup about 3/4 full – they’ll puff up beautifully in the oven. Pop them on the middle rack and set your timer for 15 minutes. When they’re done, the edges will be golden brown and the center should spring back when lightly pressed. Don’t overbake them looking for “perfect” doneness – they continue cooking a bit as they cool. Let them sit for 5 minutes before digging in (if you can wait that long!).
Tips for Perfect Baked Protein Pancake Bowls
After making dozens of batches (okay, maybe hundreds – my family’s obsessed), I’ve picked up some game-changing tricks:
- Batter consistency is key: It should pour like thick paint. Too thick? Add a splash more milk. Too thin? A sprinkle more oat flour will fix it.
- Protein powder matters: Whey blends smoothest, but if you’re plant-based, look for “baking friendly” blends. My current favorite is vanilla pea protein – no weird aftertaste!
- Grease like you mean it: These stick like crazy! I use butter or nonstick spray in every nook – even for nonstick pans. For guaranteed release, try my grandma’s trick: butter + a dusting of oat flour.
- Don’t peek! Resisting the urge to open the oven pays off. That sudden temperature drop can make them sink in the middle.
Follow these and you’ll get perfect pancake bowls every single time.
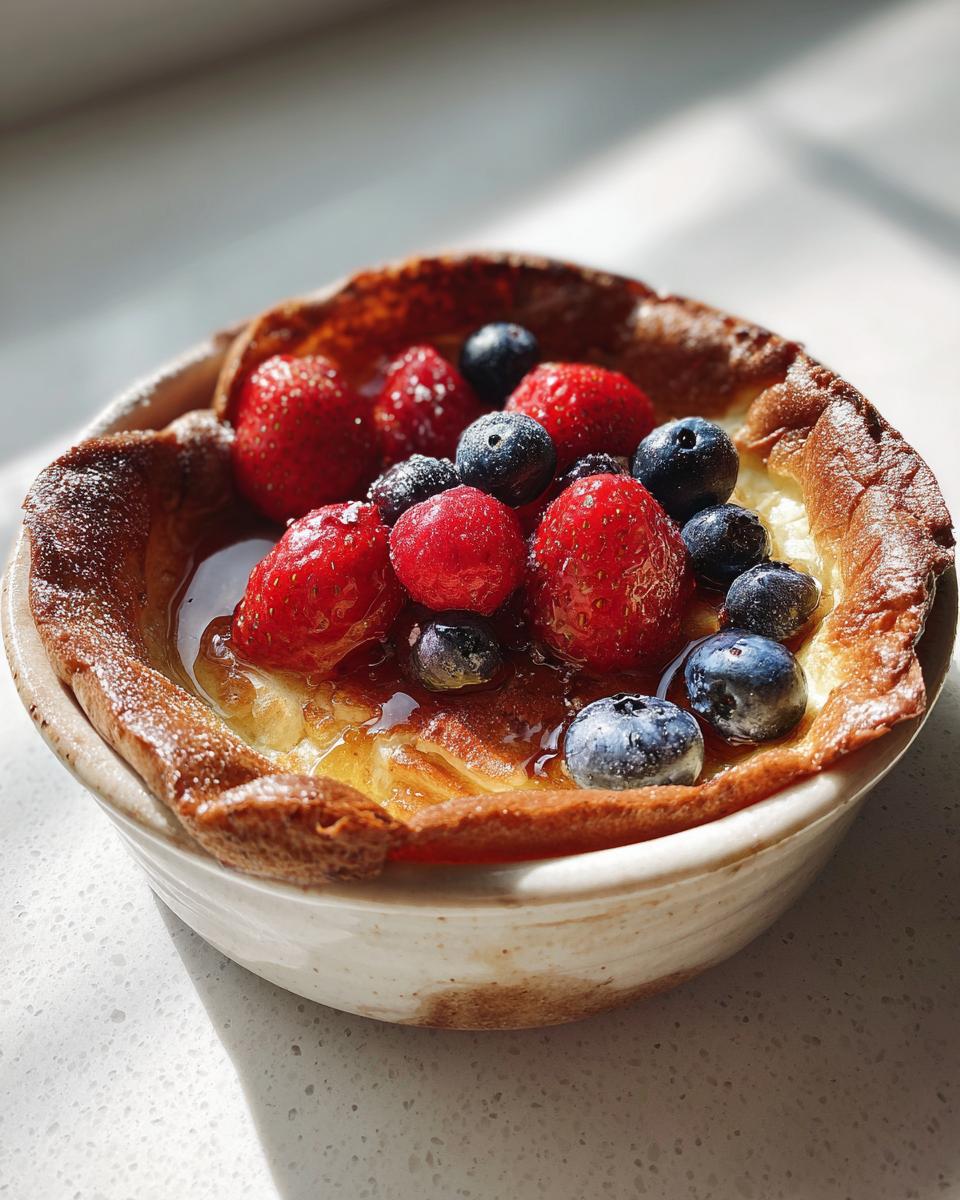
Topping Ideas for Baked Protein Pancake Bowls
Here’s where the real fun begins – dressing up your pancake bowls! I treat mine like blank canvases for flavor experiments. My current obsession? A schmear of almond butter with banana slices and a drizzle of honey. But don’t let me limit your creativity – the topping possibilities are endless:
- Fresh fruit: Berries, sliced peaches, or sautéed apples (my kids go wild for these)
- Nut butters: Peanut, almond, or even tahini for a savory twist
- Extra protein: Greek yogurt dollop or a sprinkle of chopped nuts
- Crunch factor: Chia seeds, granola, or toasted coconut flakes
- Sweet treats: Dark chocolate chips or a light maple syrup drizzle
Mix and match – that’s half the joy of these protein-packed bowls!
Storage and Reheating
Here’s the beautiful thing about these baked protein pancake bowls – they’re even better as leftovers! Once cooled, stash them in an airtight container in the fridge for up to 3 days. When you’re ready to eat, just pop one in the microwave for 20-30 seconds (careful, they get hot fast!) or crisp them up in a toaster oven. They taste just-baked every time.
Nutritional Information
Here’s the scoop on what’s in these baked protein pancake bowls (per serving):
- Calories: 220
- Protein: 18g
- Carbs: 30g
- Fiber: 3g
- Sugar: 8g
Psst – these values are estimates and may vary slightly based on specific ingredients used. But hey, it’s all good stuff!
FAQs About Baked Protein Pancake Bowls
Got questions? I’ve got answers! Here are the most common things people ask me about these baked protein pancake bowls:
Can I Use a Different Flour?
Absolutely! While oat flour is my go-to (it’s so forgiving!), you can swap in almond flour, whole wheat flour, or even coconut flour. Just keep in mind that some flours absorb more liquid than others. For almond flour, you might need a splash less milk, and for coconut flour, you’ll definitely need more liquid – it’s thirsty stuff! Start with about 1/4 cup extra milk if you’re using coconut flour.
How Do I Prevent Dryness?
Dry pancake bowls are the worst, right? The key is to not overbake them. Pull them out when they’re just set in the middle – a slight jiggle is okay! Also, using full-fat Greek yogurt makes a huge difference in keeping them moist. If you’re using low-fat yogurt, try adding an extra tablespoon of milk to the batter.
Got more questions? Drop them in the comments! And don’t forget to try this recipe and tag us – I’d love to see your creations!
Print18g Protein Pancake Bowls – The Ultimate Easy Breakfast Hack
A high-protein breakfast option that’s easy to make and customizable to your taste.
- Prep Time: 5 minutes
- Cook Time: 20 minutes
- Total Time: 25 minutes
- Yield: 4 servings 1x
- Category: Breakfast
- Method: Baking
- Cuisine: American
- Diet: Low Fat
Ingredients
- 1 cup oat flour
- 1 scoop vanilla protein powder
- 1 tsp baking powder
- 1/2 cup Greek yogurt
- 1/4 cup milk
- 1 egg
- 1 tbsp honey
- 1/2 tsp vanilla extract
Instructions
- Preheat oven to 350°F (175°C).
- Mix oat flour, protein powder, and baking powder in a bowl.
- Add Greek yogurt, milk, egg, honey, and vanilla extract. Stir until smooth.
- Pour batter into greased muffin tins or small bowls.
- Bake for 15-20 minutes until golden and firm.
- Let cool slightly before serving with toppings of your choice.
Notes
- Use any milk you prefer.
- Top with fresh fruit, nut butter, or syrup.
- Store leftovers in the fridge for up to 3 days.
Nutrition
- Serving Size: 1 bowl
- Calories: 220
- Sugar: 8g
- Sodium: 180mg
- Fat: 4g
- Saturated Fat: 1g
- Unsaturated Fat: 2g
- Trans Fat: 0g
- Carbohydrates: 30g
- Fiber: 3g
- Protein: 18g
- Cholesterol: 50mg


