Oh, my goodness, if you haven’t experienced the sheer joy of a homemade cruffin yet, you are in for such a treat! Seriously, these aren’t just pastries; they’re little edible hugs that combine everything wonderful about a flaky, buttery croissant with the comforting, individual portion of a muffin. I remember the first time I saw them pop up on my feed – I was instantly obsessed! My kitchen basically became a cruffin laboratory for weeks as I tried to perfect that delicate balance of crispy layers and soft, airy dough. It was a delicious journey, let me tell you!
There’s something incredibly satisfying about taking simple ingredients and transforming them into something so utterly beautiful and delicious. And these homemade cruffins? They deliver on that promise big time. Each bite is a symphony of textures and flavors, and honestly, the smell alone as they bake will make your whole home feel like the coziest bakery. Trust me, once you make these, you’ll feel like a total pastry wizard, and your friends and family will be begging for more!
Why You’ll Love These Homemade Cruffins
Okay, so why should you even bother making these beauties? Because they’re absolutely *divine*, that’s why! These homemade cruffins aren’t just another pastry; they’re an experience. Imagine biting into something that’s both incredibly flaky and wonderfully tender, with that rich, buttery taste that just screams indulgence. They’re like a little piece of bakery heaven, right in your own kitchen.
The Allure of Homemade Cruffins
Honestly, what’s not to love? They look fancy, but they’re surprisingly approachable to make. The way the layers just melt in your mouth is truly something special. It’s that perfect balance of textures and flavors that makes them so addictive!
Flaky, Buttery Perfection
Oh, the layers! That’s the real magic here. We’re talking about those delicate, buttery layers that you usually only find in a croissant, but all bundled up in a cute, muffin-like shape. Every single bite gives you that glorious crunch followed by a soft, tender crumb. It’s pure bliss!
A Delightful Breakfast or Treat
These aren’t just for breakfast, though they make an amazing start to any day. They’re also perfect for a fancy brunch, an afternoon pick-me-up with your coffee, or even a light dessert. They’re so versatile – you can enjoy them plain, with a dusting of powdered sugar, or even get creative with fillings if you’re feeling extra adventurous!
Essential Equipment for Perfect Homemade Cruffins
Alright, before we dive into the doughy goodness, let’s talk tools! You don’t need a whole fancy bakery setup, but having the right equipment makes this process so much smoother and more enjoyable. Trust me, a little prep goes a long way to making your homemade cruffins perfect!
Tools for Crafting Your Homemade Cruffins
You’ll want a few key things on hand to make sure your cruffin-making adventure is a breeze. A good, sturdy muffin tin is essential, of course, for giving them their signature shape. A rolling pin is your best friend for getting that dough super thin, and a pastry brush will help you get all that delicious melted butter everywhere it needs to be!
Ingredients for Your Homemade Cruffins
Okay, let’s get down to the nitty-gritty: what you’ll need to make these amazing homemade cruffins! I always say, good ingredients are the start of any great bake. Nothing too fancy here, just your everyday pantry staples, but each one plays a super important role in creating that perfect flaky, buttery texture.
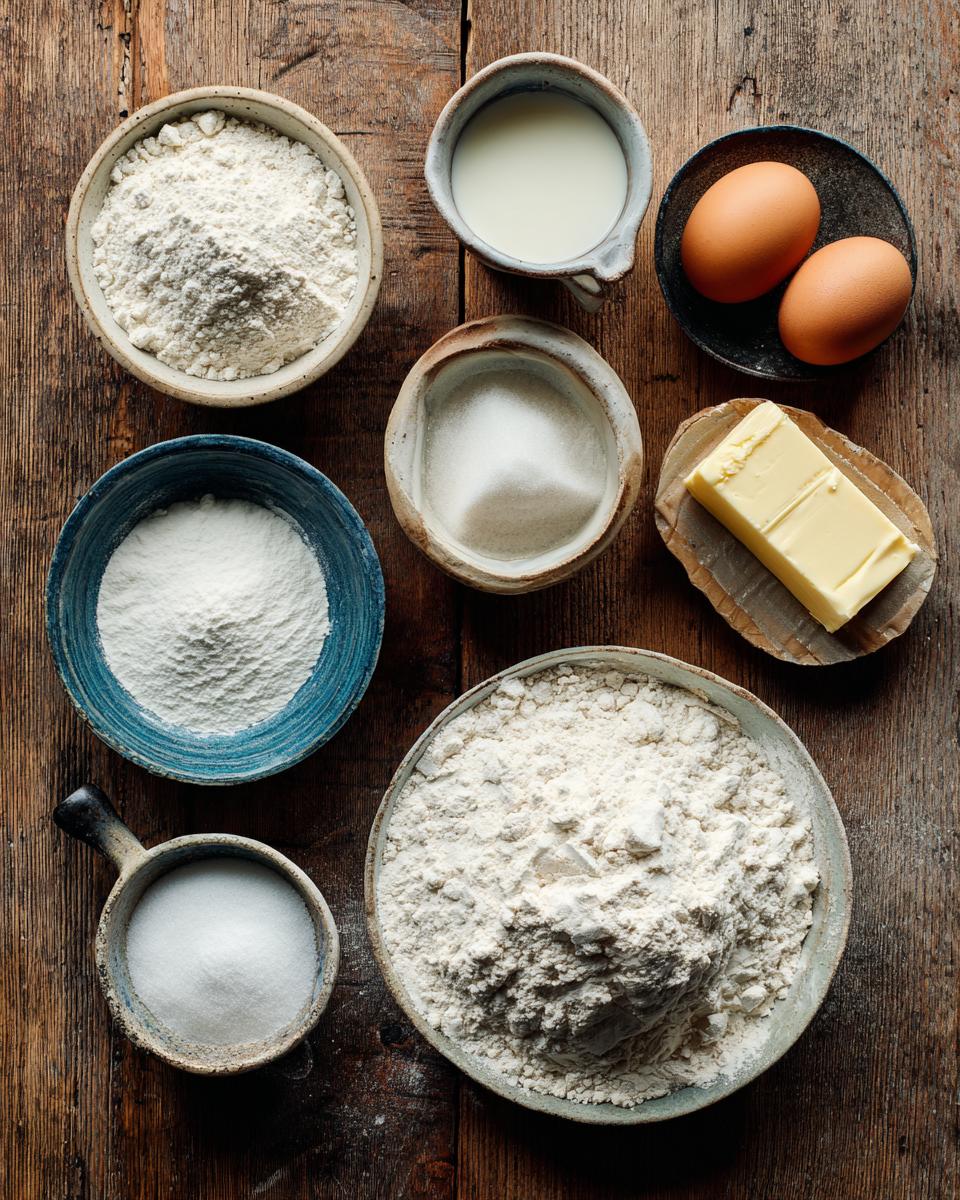
Gathering Your Homemade Cruffins Components
Before you even think about mixing, make sure you’ve got everything laid out and measured. It makes the whole process so much less stressful, trust me! And pay attention to those little details, like whether the butter needs to be softened or melted – it really does make a difference!
Dough Essentials
- 1 cup warm milk (105-115°F): Not too hot, not too cold! Just right for waking up that yeast.
- 2 1/4 teaspoons active dry yeast: The magic worker that makes our cruffins light and airy.
- 1/4 cup granulated sugar: Just enough sweetness for the dough, and a little food for the yeast!
- 1 large egg: For richness and binding everything together beautifully.
- 1 teaspoon alcohol-free vanilla extract: A hint of warmth and flavor.
- 3 1/2 cups all-purpose flour, plus more for dusting: Our main building block! Have extra on hand for rolling.
- 1 teaspoon salt: Don’t skip this! It balances the sweetness and brings out all the flavors.
Butter for Flakiness
- 1/2 cup (1 stick) unsalted butter, softened: This goes into the dough itself, adding that lovely rich flavor and tender texture. Make sure it’s *softened* – not melted!
- 1/2 cup (1 stick) unsalted butter, melted, for brushing: This is the secret to all those amazing flaky layers! We’ll be brushing this generously.
Optional Dusting
- Powdered sugar, for dusting: Totally optional, but it makes them look so pretty and adds a delicate sweetness!
How to Make Homemade Cruffins: Step-by-Step Guide
Alright, this is where the magic happens! Don’t be intimidated; making homemade cruffins is super fun, and I’ll walk you through every single step. Just take your time, and you’ll be a cruffin-making pro in no time!
Preparing the Dough for Homemade Cruffins
First things first, we need to get our dough happy and rising. This is the foundation for those amazing flaky layers!
Activating the Yeast
Grab a big bowl, because this dough is going to grow! Pour in your warm milk – remember, we want it between 105-115°F. Too hot, and you’ll kill our little yeast friends; too cold, and they won’t wake up! Sprinkle in the yeast and a tablespoon of that granulated sugar. Give it a gentle stir, then just let it hang out for about 5 minutes. You’ll see it get all bubbly and foamy on top. That’s how you know your yeast is alive and ready to party!
Mixing and Kneading
Once your yeast is foamy, stir in the rest of the sugar, your egg, and the alcohol-free vanilla extract. Now, gradually add your flour and salt. Mix it all up until you’ve got a shaggy, somewhat messy dough. Don’t worry, it’ll come together! Turn that dough out onto a lightly floured surface (don’t add too much flour, just enough to keep it from sticking) and get to kneading. You’ll want to knead for about 5-7 minutes. It’s a little arm workout, but so worth it! You’re looking for a smooth, elastic dough that springs back when you poke it gently.
First Rise
Lightly oil your mixing bowl, pop your beautifully kneaded dough in, and turn it over once to coat. Cover that bowl with plastic wrap (I sometimes use a clean kitchen towel too!) and find a nice warm spot in your kitchen. This could be near a sunny window, on top of your fridge, or even in a slightly warmed (but turned off!) oven. Let it rise for 1 to 1.5 hours, or until it’s gloriously doubled in size. This is where patience pays off!
Shaping Your Homemade Cruffins
Now for the fun, artistic part! This is how we get those incredible layers.
Dividing and Rolling
Once your dough has had its first rise, gently punch it down to release the air. Turn it out onto a lightly floured surface and divide it into 6 equal pieces. I like to use a kitchen scale for this to be super precise, but eyeballing it is totally fine too! Now, take each piece and roll it out into a very thin rectangle. We’re talking about 12×6 inches, or as thin as you can get it without tearing. The thinner, the flakier!
Buttering and Rolling Logs
This is crucial! Take your melted butter and brush each thin rectangle generously. Don’t be shy here; this is where all those flaky layers come from. Starting from one of the long sides, tightly roll up each buttered rectangle into a log. You want it nice and snug, like a little doughy sleeping bag!
The Twist and Coil
Now, take each log and cut it in half lengthwise. You’ll have two long strips of dough, with all those beautiful layers exposed. Place the two halves next to each other, cut-side up, and twist them together. It’s like braiding, but with just two strands! Once twisted, coil that twisted dough into a spiral, tucking the ends underneath. This creates that signature cruffin shape. Pop each one into a greased muffin tin.
The Second Rise and Baking Homemade Cruffins
Almost there! A final rise and then into the oven.
Final Rise
Cover your muffin tin loosely with plastic wrap and let your shaped cruffins rise again in that warm spot for another 30-45 minutes. They should look noticeably puffy. This second rise is important for a light and airy texture!
Baking to Golden Perfection
While they’re doing their final rise, preheat your oven to 375°F (190°C). Once preheated and your cruffins are puffy, pop them into the oven. Bake for 18-22 minutes, or until they’re a beautiful golden brown and sound hollow when you tap them gently. They’ll smell absolutely incredible, too!
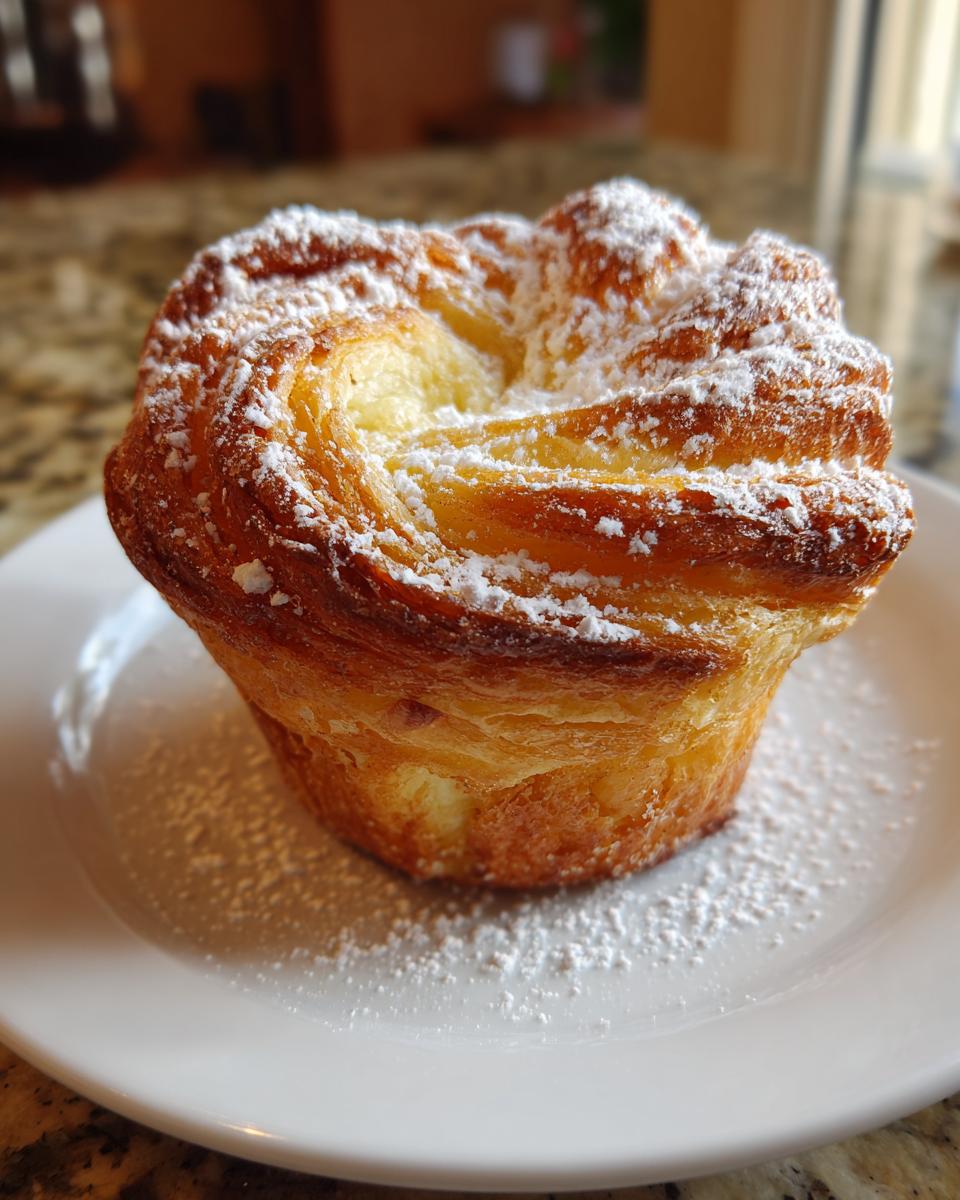
Cooling and Finishing
Let those gorgeous homemade cruffins cool in the muffin tin for just a few minutes – they’ll be hot! Then, carefully transfer them to a wire rack to cool completely. If you want to be extra fancy (and why not?), dust them with a little powdered sugar before serving. Enjoy your masterpieces!
Tips for Homemade Cruffins Success
Mastering Your Homemade Cruffins
Okay, so you’ve made it this far, and your kitchen probably smells like heaven! To make sure every batch of your homemade cruffins is an absolute triumph, I’ve got a few little tricks up my sleeve. First, the butter quality *really* matters here; go for the good stuff, it makes a huge difference in flavor and flakiness. Don’t rush the rising times either – yeast works on its own schedule, and patience is key for that perfect airy texture. And when you’re rolling out the dough, don’t be afraid to go super thin! That’s how you get all those amazing layers. Trust your instincts, and have fun!
Homemade Cruffins: Storage and Serving Suggestions
Enjoying Your Homemade Cruffins
Okay, so you’ve baked these beauties, and now what? Honestly, homemade cruffins are *best* enjoyed fresh, warm from the oven, when those layers are at their absolute peak flakiness. But hey, sometimes you have leftovers (lucky you!). Just pop them into an airtight container at room temperature, and they’ll be good for up to 2 days. If you want to bring back that fresh-baked feel, a quick 5-10 minutes in a 300°F (150°C) oven will do the trick. They’re amazing with coffee, tea, or even a glass of cold milk. Pure bliss!
Frequently Asked Questions About Homemade Cruffins
Your Homemade Cruffins Questions Answered
Got questions about your delicious homemade cruffins? Don’t worry, I’ve got answers! These are some of the most common things people ask me when they’re making these amazing pastries.
Can I prepare Homemade Cruffins dough in advance?
Absolutely! You can totally make the dough ahead of time. After the first rise, punch down the dough, form it into a disk, wrap it tightly in plastic wrap, and pop it in the fridge overnight. Just remember to let it come to room temperature for about 30-60 minutes before you start rolling and shaping your homemade cruffins. This makes them perfect for a fresh-baked breakfast without the super early start!
What fillings work best for these Homemade Cruffins?
Oh, the possibilities are endless! For sweet homemade cruffins, I love a sprinkle of cinnamon sugar, a dollop of fruit preserves (like raspberry or apricot), or even some mini chocolate chips before you roll them up. You could even do a little cream cheese filling! For something a bit different, a spread of pesto or a sprinkle of cheese would be surprisingly delicious – get creative!
How do I get extra flaky Homemade Cruffins?
The secret to super flaky homemade cruffins is all in the rolling and buttering! Make sure you roll that dough out as thin as you possibly can without tearing it. And don’t be shy with the melted butter – brush it generously over the entire surface before you roll it into a log. The more distinct layers of butter and dough, the flakier your cruffins will be!
Estimated Nutritional Information for Homemade Cruffins
Understanding Your Homemade Cruffins
Just a quick heads-up about the nutritional info for these homemade cruffins! While I’ve given you some estimates, please remember that these can vary quite a bit. Things like the exact brands of ingredients you use, how much butter you brush on, or even the size of your eggs can change the final numbers. So, think of these as a general guide, not a precise scientific breakdown!
PrintHomemade Cruffins

These homemade cruffins are a delightful combination of a croissant and a muffin. Flaky, buttery, and perfect for breakfast or a sweet treat.
- Prep Time: 45 minutes
- Cook Time: 20 minutes
- Total Time: 2 hours 50 minutes
- Yield: 6 cruffins 1x
- Category: Breakfast
- Method: Baking
- Cuisine: French
- Diet: Vegetarian
Ingredients
- 1 cup warm milk (105-115°F)
- 2 1/4 teaspoons active dry yeast
- 1/4 cup granulated sugar
- 1 large egg
- 1 teaspoon vanilla extract
- 3 1/2 cups all-purpose flour, plus more for dusting
- 1 teaspoon salt
- 1/2 cup (1 stick) unsalted butter, softened
- 1/2 cup (1 stick) unsalted butter, melted, for brushing
- Powdered sugar, for dusting (optional)
Instructions
- In a large bowl, combine warm milk, yeast, and 1 tablespoon of the sugar. Let sit for 5 minutes until foamy.
- Stir in the remaining sugar, egg, and vanilla extract.
- Gradually add the flour and salt, mixing until a shaggy dough forms.
- Turn the dough out onto a lightly floured surface and knead for 5-7 minutes, until smooth and elastic.
- Place the dough in a lightly oiled bowl, cover with plastic wrap, and let rise in a warm place for 1-1.5 hours, or until doubled in size.
- Punch down the dough and divide it into 6 equal pieces.
- On a lightly floured surface, roll each piece of dough into a very thin rectangle (about 12×6 inches).
- Brush each rectangle generously with melted butter.
- Starting from one long side, tightly roll up each rectangle into a log.
- Cut each log in half lengthwise.
- Twist the two halves together, then coil the twisted dough into a spiral, tucking the ends underneath.
- Place each cruffin into a greased muffin tin.
- Cover with plastic wrap and let rise again for 30-45 minutes, or until puffy.
- Preheat oven to 375°F (190°C).
- Bake for 18-22 minutes, or until golden brown and cooked through.
- Let cool in the muffin tin for a few minutes before transferring to a wire rack to cool completely.
- Dust with powdered sugar before serving, if desired.
Notes
- For best results, use good quality butter.
- You can add fillings like chocolate chips, cinnamon sugar, or fruit preserves before rolling.
- Cruffins are best enjoyed fresh on the day they are made.
- Store leftover cruffins in an airtight container at room temperature for up to 2 days.
Nutrition
- Serving Size: 1 cruffin
- Calories: 450
- Sugar: 20g
- Sodium: 350mg
- Fat: 25g
- Saturated Fat: 15g
- Unsaturated Fat: 8g
- Trans Fat: 0.5g
- Carbohydrates: 50g
- Fiber: 2g
- Protein: 8g
- Cholesterol: 70mg


