Oh, you guys, there’s just something magical about baking, isn’t there? Especially when you pull something out of the oven that smells like pure heaven and looks like it came straight from a fancy patisserie. I still remember my very first attempt at homemade French croissants – it was a disaster! Butter oozed everywhere, the layers were nonexistent, and they tasted more like dense rolls than delicate pastries. I almost gave up right then and there!
But that’s the thing about passion, right? You pick yourself up, dust off the flour, and try again. And again! Over the years, I’ve spent countless hours in my kitchen, experimenting, tweaking, and, let’s be honest, making a glorious mess, all in the pursuit of that perfect, flaky bite. And guess what? I cracked the code! I’ve figured out all the little secrets to achieving those beautiful, ethereal layers right in your own kitchen.
Making homemade French croissants might sound intimidating, but trust me, with this recipe, you’re going to feel like a total baking wizard. It’s so incredibly rewarding, and the look on your friends’ faces when they taste these? Priceless!
Why You’ll Love These Homemade French Croissants
Okay, so why bother with all the rolling and chilling for these homemade French croissants? Because the payoff is HUGE, my friends! Seriously, you’ll be obsessed. Here’s why:
- That Flaky, Buttery Texture: There’s nothing quite like biting into those shatteringly crisp, tender layers. Store-bought just can’t compare!
- Incredible Flavor: We’re talking rich, deep butteriness that fills your mouth with every bite. So good!
- Seriously Impressive: Your guests will think you’re a culinary genius. Prepare for all the compliments!
- Pure Baking Satisfaction: There’s a special kind of joy in creating something so beautiful and delicious from scratch.

Essential Equipment for Perfect Homemade French Croissants
Now, before we dive into the delicious details, let’s chat about what you’ll need. Don’t worry, you don’t need a professional bakery setup for these homemade French croissants! Most of these things you probably already have in your kitchen. It’s really about technique, not super fancy gadgets!
Tools for Crafting Your Homemade French Croissants
- A sturdy rolling pin (a French one is lovely, but any will do!)
- Large baking sheets
- Parchment paper (your best friend for non-stick baking!)
- A sharp knife or pizza cutter for shaping
- Plastic wrap
Ingredients for Homemade French Croissants
Alright, let’s talk ingredients! Just like with any good recipe, the quality of what you put in directly impacts what comes out. For these homemade French croissants, we’re aiming for flaky, buttery perfection, so choosing good quality ingredients is key. Don’t skimp here, folks – your taste buds will thank you!
Dough Ingredients for Homemade French Croissants
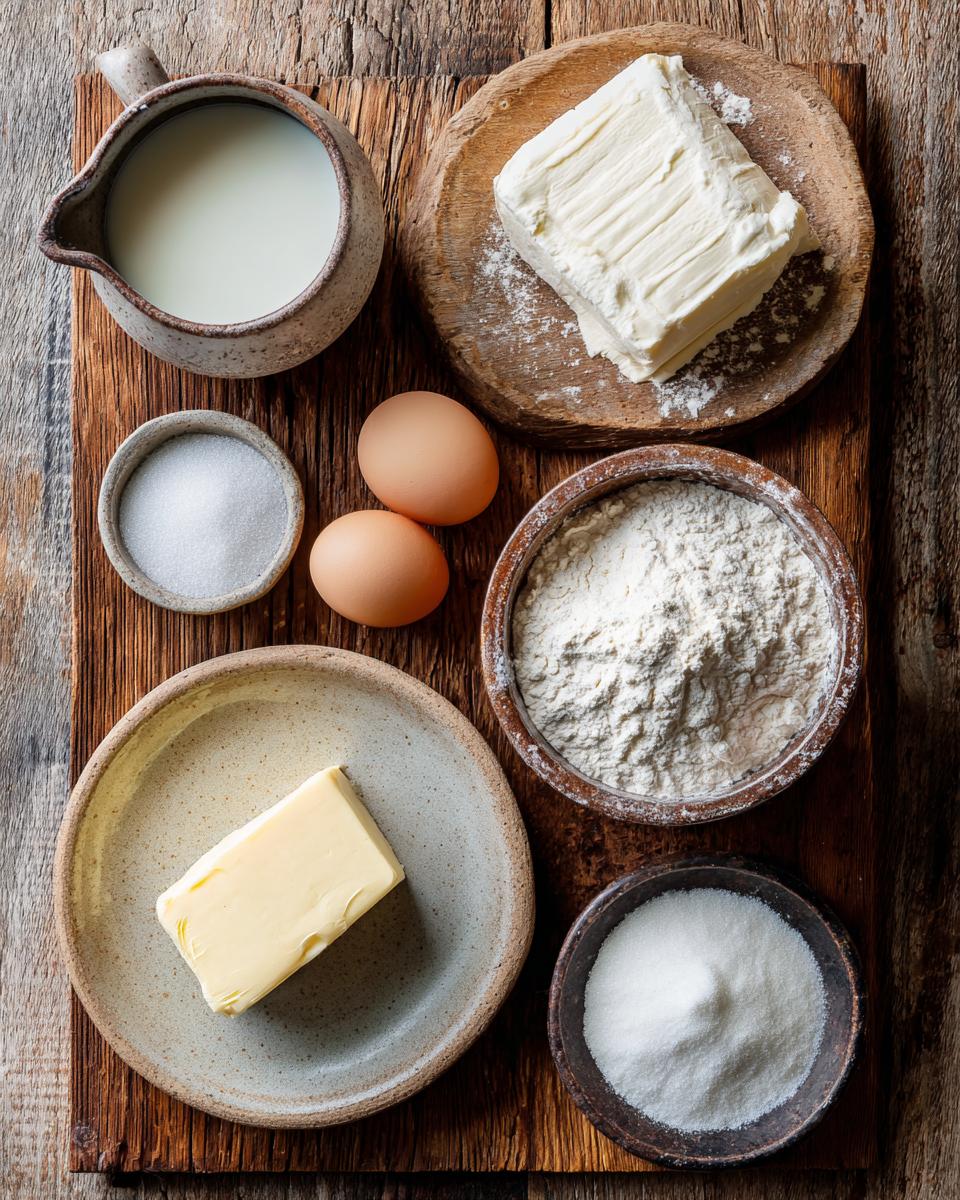
- 1 cup (240ml) warm milk (make sure it’s between 105-115°F/40-46°C – too hot or too cold and your yeast won’t be happy!)
- 2 teaspoons active dry yeast (the stuff that makes everything light and airy!)
- 1/4 cup (50g) granulated sugar
- 1 teaspoon salt (don’t forget this, it really brings out the flavors)
- 3 1/2 cups (420g) all-purpose flour, plus a little extra for dusting
Lamination Butter for Homemade French Croissants
- 1 cup (226g) unsalted butter, and this is super important – it HAS to be cold!
Crafting Your Homemade French Croissants: Step-by-Step Guide
Okay, deep breaths everyone! This is where the magic really happens. Making homemade French croissants is a process, but trust me, each step is totally doable and so satisfying. I’m going to walk you through it, just like I’m right there in the kitchen with you. Don’t rush, have fun, and get ready for some serious baking!
Preparing the Dough for Homemade French Croissants
First things first, let’s get that dough going! In a big bowl, gently whisk your yeast into the warm milk. Let it hang out for about 5 minutes; you want to see it get all foamy and bubbly – that means your yeast is alive and ready to party! Stir in the sugar and salt, then add your flour. Mix it up until it just comes together into a shaggy mess. Turn it out onto a lightly floured surface and knead for 5-7 minutes. You’re looking for a smooth, elastic ball. Pop it into a lightly oiled bowl, cover it up, and let it rise in a warm spot for about an hour, or until it’s beautifully doubled in size. This initial rise is super important for flavor and texture!
The Art of Lamination for Homemade French Croissants
Now for the really fun part – lamination! Gently punch down your risen dough and roll it out into a nice 12×12 inch square. Grab your super cold butter (seriously, don’t let it get soft!) and slice it into ½-inch thick pieces. Arrange these buttery beauties right in the center of your dough, leaving about an inch border all around. Now, carefully fold the edges of the dough over the butter, sealing it up like a little package. You want to make sure no butter peeks out! Gently roll this butter-filled dough into a 16×8 inch rectangle. Then, fold it into thirds, just like you’re folding a letter. This is your first “turn.” Wrap it snugly in plastic wrap and pop it into the fridge for 30 minutes. You’re going to repeat this rolling, folding, and chilling process two more times, for a total of three turns. Each chill is crucial for keeping that butter cold and creating those amazing layers!
Shaping and Baking Your Homemade French Croissants
After your final chill, roll the dough out one last time into a 16×12 inch rectangle. Now, grab that sharp knife or pizza cutter and cut the dough into triangles. My favorite part is shaping them! Starting from the wide end of each triangle, gently roll it up tightly into that classic crescent shape. Place your beautiful creations on a baking sheet lined with parchment paper, making sure to give them plenty of space to grow. Cover them loosely and let them rise in a warm place for 1-2 hours – they should look puffy and feel light. Preheat your oven to 400°F (200°C). Whisk an egg with a tablespoon of water for a lovely egg wash, and brush it gently over each croissant. Bake for 15-20 minutes, or until they’re gloriously golden brown and smell absolutely irresistible. Let them cool slightly on a wire rack, if you can resist, before devouring!
Tips for Flawless Homemade French Croissants
Okay, so you’ve made it this far, and your kitchen probably smells amazing! To make sure your homemade French croissants are absolutely perfect every single time, I’ve got a few extra tips and tricks up my sleeve. These little nuggets of wisdom will help you avoid common pitfalls and ensure you get those beautiful, flaky layers we’re all dreaming of!
Mastering the Dough for Homemade French Croissants
The golden rule for amazing homemade French croissants? Don’t overwork your dough! Seriously, gentle hands are key. Also, pay attention to temperature. If your kitchen is too warm, your butter will melt, and we don’t want that. Keep everything cool, calm, and collected!
Achieving Perfect Layers in Homemade French Croissants
This is crucial! Always, always keep your butter cold. If it gets too warm, those beautiful layers will just melt into the dough instead of creating that stunning flakiness. Roll evenly, too – no squishing one side more than the other!
Troubleshooting Your Homemade French Croissants
Got sticky dough? A little extra flour on your surface helps, but don’t add too much to the dough itself. Uneven baking? Rotate your baking sheets halfway through! It’s all about paying attention and making small adjustments.
Homemade French Croissants: Frequently Asked Questions
I know you’re probably bursting with questions, especially when making something as intricate as homemade French croissants for the first time! Don’t worry, I’ve got your back. Here are some of the most common questions I get asked, and my best tips to help you along your croissant journey.
Can I Prepare Homemade French Croissants in Advance?
Absolutely! You can prepare the dough through the lamination steps and keep it in the fridge for up to 2 days before shaping. For unbaked croissants, you can freeze them after shaping and proofing – just bake from frozen, adding an extra few minutes to the bake time!
What if My Croissants Don’t Rise Properly?
Oh, the dreaded flat croissant! This usually means your yeast wasn’t active enough (check the milk temperature!) or your proofing environment wasn’t warm enough. Be patient, give them a warm, draft-free spot, and make sure your yeast is fresh!
How to Store Leftover Homemade French Croissants?
Honestly, homemade French croissants are best eaten fresh! But if you have leftovers, store them in an airtight container at room temperature for a day or two. To reheat, pop them in a 350°F (175°C) oven for a few minutes until warm and crisp again. Yum!
Estimated Nutritional Information for Homemade French Croissants
Just a quick heads-up, friends: the nutritional values here are estimates. They can totally change based on the specific brands and exact ingredients you use. Think of it as a general guide!
Share Your Homemade French Croissants Experience
You’ve done it! You’ve made your own homemade French croissants! I’d absolutely LOVE to hear about your baking adventure. Drop a comment below, rate the recipe, and don’t forget to share your gorgeous creations on social media – tag me, I can’t wait to see them!
PrintHomemade French Croissants

Flaky, buttery croissants made from scratch. This recipe guides you through the process of laminating dough to achieve perfect layers.
- Prep Time: 2 hours
- Cook Time: 20 minutes
- Total Time: 2 hours 20 minutes plus chilling time
- Yield: 12 croissants 1x
- Category: Breakfast
- Method: Baking
- Cuisine: French
- Diet: Vegetarian
Ingredients
- 1 cup (240ml) warm milk (105-115°F/40-46°C)
- 2 teaspoons active dry yeast
- 1/4 cup (50g) granulated sugar
- 1 teaspoon salt
- 3 1/2 cups (420g) all-purpose flour, plus more for dusting
- 1 cup (226g) unsalted butter, cold
Instructions
- In a large bowl, dissolve yeast in warm milk. Stir in sugar and salt. Let sit for 5 minutes until foamy.
- Add flour to the yeast mixture and mix until a shaggy dough forms. Turn onto a lightly floured surface and knead for 5-7 minutes until smooth and elastic.
- Form the dough into a ball, place in a lightly oiled bowl, cover, and let rise in a warm place for 1 hour, or until doubled in size.
- Punch down the dough and roll it into a 12×12 inch square.
- Cut the cold butter into 1/2-inch thick slices and arrange them in the center of the dough, leaving a 1-inch border.
- Fold the edges of the dough over the butter, sealing it completely.
- Roll the dough into a 16×8 inch rectangle. Fold the dough into thirds, like a letter. This is your first ‘turn’.
- Wrap the dough in plastic wrap and refrigerate for 30 minutes.
- Repeat the rolling, folding, and chilling process two more times (for a total of three turns).
- After the final chill, roll the dough into a 16×12 inch rectangle.
- Cut the dough into triangles.
- Starting from the wide end, roll each triangle tightly into a crescent shape.
- Place croissants on a baking sheet lined with parchment paper, leaving space between them.
- Cover and let rise in a warm place for 1-2 hours, or until puffy.
- Preheat oven to 400°F (200°C).
- Brush croissants with an egg wash (1 egg whisked with 1 tablespoon water).
- Bake for 15-20 minutes, or until golden brown and flaky.
- Let cool on a wire rack before serving.
Notes
- Ensure your butter is very cold for proper lamination.
- Do not overwork the dough during folding to maintain layers.
- Adjust baking time based on your oven.
- Croissants are best enjoyed fresh on the day they are baked.
Nutrition
- Serving Size: 1 croissant
- Calories: 280
- Sugar: 8g
- Sodium: 200mg
- Fat: 18g
- Saturated Fat: 11g
- Unsaturated Fat: 5g
- Trans Fat: 0.5g
- Carbohydrates: 25g
- Fiber: 1g
- Protein: 5g
- Cholesterol: 45mg


