Oh my goodness, friends, do I have a treat for you today! Get ready to have your dessert world rocked because we’re diving headfirst into the glorious, utterly decadent world of Red Velvet Cheesecake Cake! Seriously, this isn’t just a cake; it’s a celebration, a showstopper, a dessert that makes people gasp when you bring it to the table.
I remember the first time I ever tasted anything like it. It was at a little bakery, and I thought, “How can two of my favorite things be *even better* together?” That moment sparked a mission! As someone who practically lives in the kitchen, experimenting with flavors and textures is my jam, and combining the luxurious tang of cheesecake with the moist, tender crumb of red velvet cake has become one of my proudest baking achievements. Trust me, if you want to impress, this Red Velvet Cheesecake Cake is your secret weapon. It’s a true testament to how incredible things happen when you bring the best of both worlds together!
Why You’ll Love This Red Velvet Cheesecake Cake
Okay, so why should *you* tackle this Red Velvet Cheesecake Cake, you ask? Because it’s not just a dessert; it’s an experience! You get the best of both worlds – that rich, velvety cake and the creamy, dreamy cheesecake – all in one glorious bite. It looks incredibly impressive, but honestly, it’s much simpler to make than it appears. It’s truly a crowd-pleaser!
The Ultimate Red Velvet Cheesecake Cake Experience
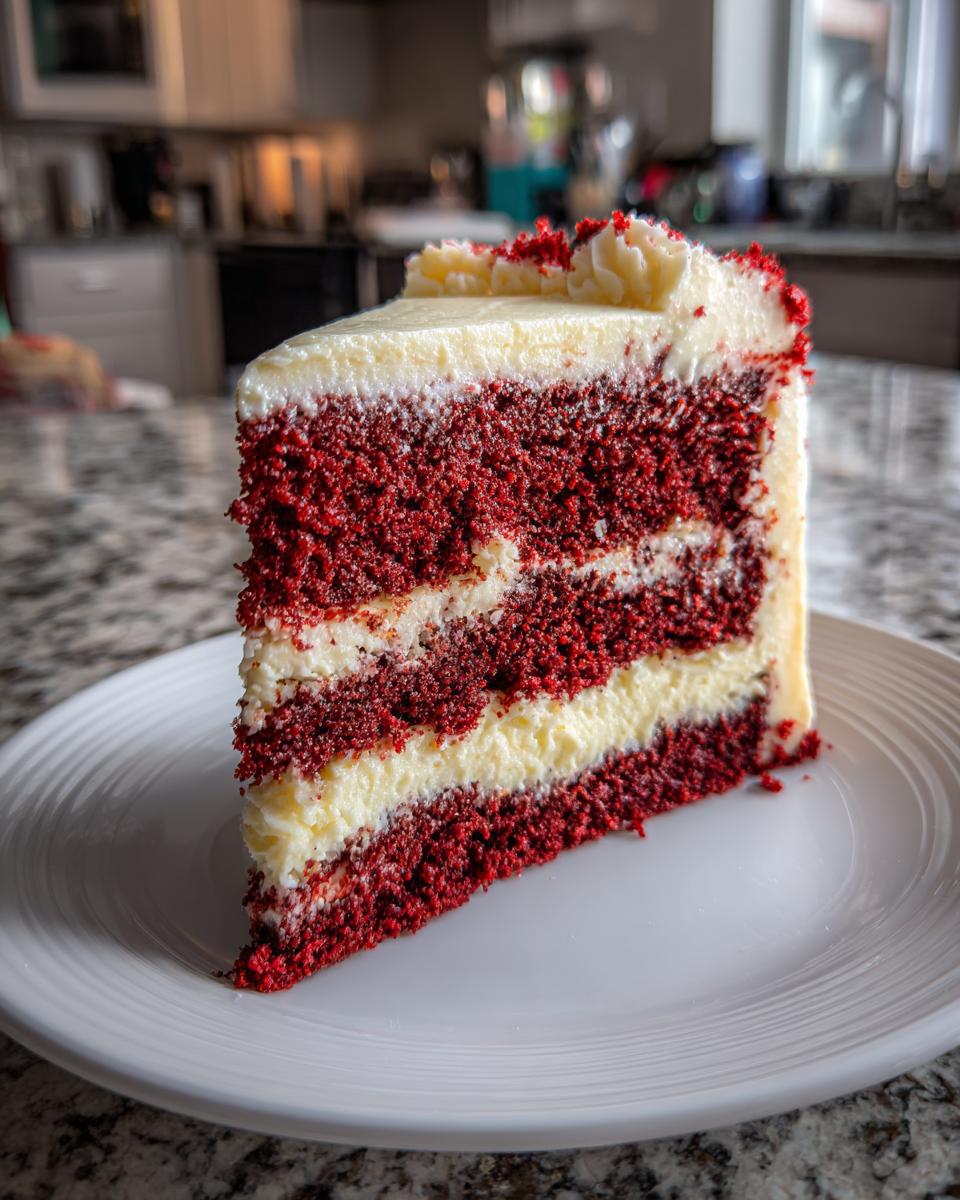
Imagine slicing into this beauty: the vibrant red cake, the creamy white cheesecake layer, and that luscious frosting. It’s a feast for the eyes before it even hits your tongue! You get the moist, tender crumb of red velvet perfectly complemented by the cool, tangy creaminess of cheesecake. It’s seriously the perfect balance!
- Easy to follow steps for a complex-looking dessert
- A show-stopping centerpiece for any gathering
- Perfect balance of tangy cream cheese and moist red velvet
Essential Equipment for Your Red Velvet Cheesecake Cake
Before we dive into mixing up this masterpiece, let’s talk tools! Having the right gadgets makes all the difference, trust me. You don’t need a professional kitchen, but a few key items will make your Red Velvet Cheesecake Cake journey smooth sailing. These are the things I reach for every single time!
Tools for a Perfect Red Velvet Cheesecake Cake
You’ll definitely want a sturdy stand mixer for creaming and whipping, a good quality 9-inch springform pan for that cheesecake layer, and two 9-inch round cake pans for your beautiful red velvet layers. Oh, and a whisk, of course!
Ingredients for Red Velvet Cheesecake Cake
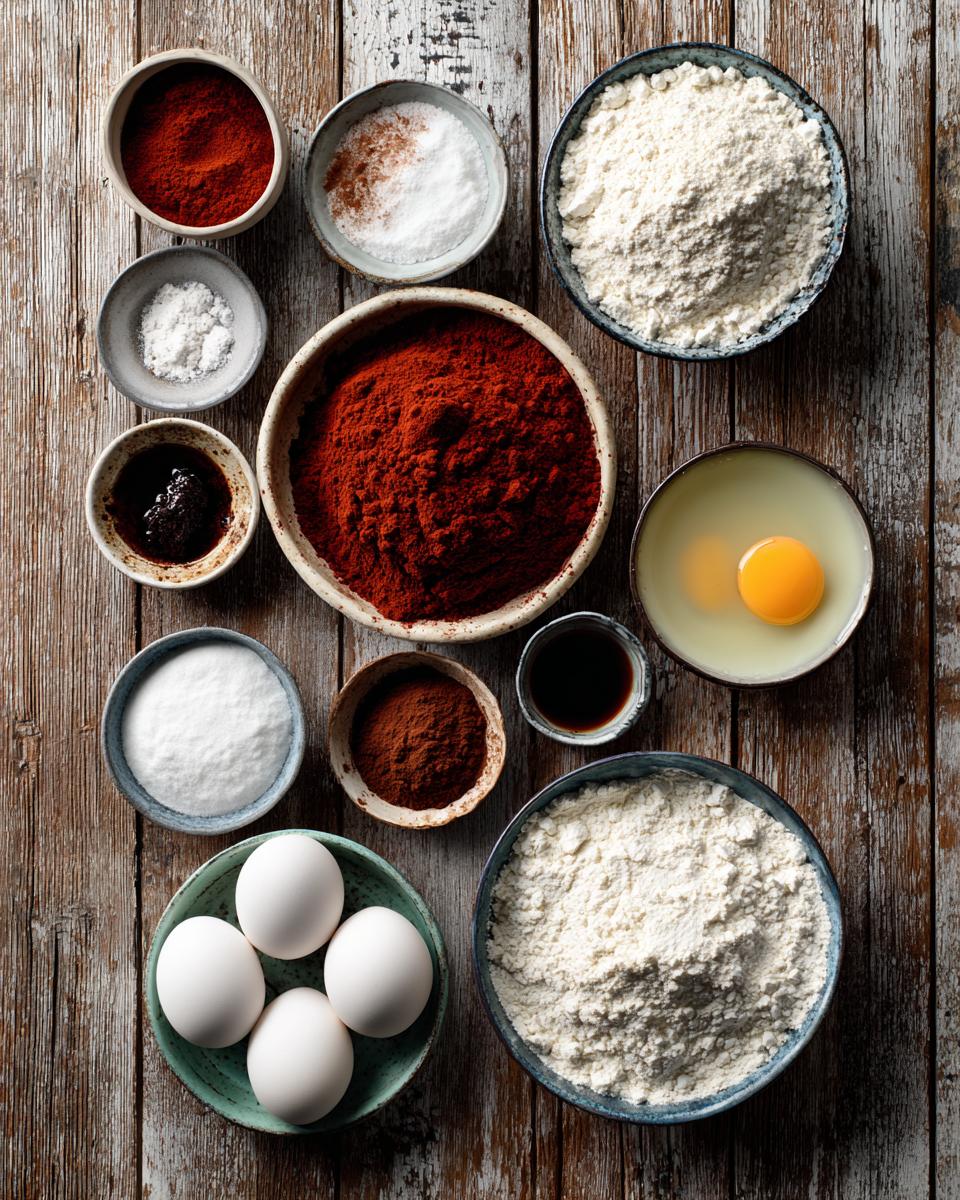
Alright, let’s get down to the nitty-gritty – the good stuff that makes this Red Velvet Cheesecake Cake so incredible! We’re talking about three distinct parts here: the super moist red velvet cake layers, the rich and creamy cheesecake, and that dreamy cream cheese frosting. For the red velvet cake, you’ll need 2 ½ cups of all-purpose flour, 1 ½ cups granulated sugar, 1 teaspoon baking soda, 1 teaspoon salt, and 1 teaspoon cocoa powder. Then, for the wet ingredients: 1 cup buttermilk, 1 cup vegetable oil, 2 large eggs, 1 tablespoon red food coloring, 1 teaspoon white vinegar, and 1 teaspoon alcohol-free vanilla extract. For the cheesecake, grab 24 ounces of softened cream cheese, 1 cup granulated sugar, 3 large eggs, and another teaspoon of alcohol-free vanilla extract. And finally, for that luscious frosting, you’ll need 1 cup (that’s 2 sticks!) of softened unsalted butter, 8 ounces of softened cream cheese, 4 cups powdered sugar, 1 teaspoon alcohol-free vanilla extract, and 2-3 tablespoons of milk or heavy cream. Phew! It sounds like a lot, but trust me, every single ingredient plays its part in this symphony of flavor!
Getting Your Red Velvet Cheesecake Cake Ingredients Ready
This is probably the most important “prep” step, so don’t skip it! Make sure your cream cheese, butter, and eggs are all at room temperature. Seriously, it makes a HUGE difference in how smoothly everything combines, both for the cake batter and that silky-smooth frosting. Just set them out on the counter a couple of hours before you plan to bake, and you’ll be golden!
How to Prepare Red Velvet Cheesecake Cake
Okay, deep breaths everyone! We’re about to bring all those lovely ingredients together and make some magic. Don’t let the multiple steps intimidate you; we’re just breaking it down into manageable chunks. Think of it like building a delicious, edible skyscraper! I’ll walk you through each part, and before you know it, you’ll have a show-stopping Red Velvet Cheesecake Cake ready to devour.
Crafting the Red Velvet Cake Layers
First up, preheat your oven to 350°F (175°C) and get those two 9-inch round cake pans prepped – grease and flour them well! In a big bowl, whisk all your dry cake ingredients together: flour, sugar, baking soda, salt, and cocoa powder. Then, in another bowl, combine the buttermilk, oil, eggs, red food coloring, vinegar, and vanilla. Pour the wet into the dry and mix *just* until combined. Seriously, don’t overmix, or your cake will be tough! Divide the batter, bake for 25-30 minutes, and let them cool for 10 minutes in the pans before flipping them onto a wire rack to cool completely. Patience here is key!
The Creamy Cheesecake Layer for Your Red Velvet Cheesecake Cake
Now, for the creamy heart of our Red Velvet Cheesecake Cake! Reduce your oven to 325°F (160°C). In a large bowl, beat that softened cream cheese and sugar together until it’s super smooth – no lumps allowed! Beat in the eggs one at a time, then stir in the vanilla. Pour this dreamy mixture into your greased 9-inch springform pan. Bake for 45-55 minutes. The edges should be set, but the center should still have a little jiggle. Turn off the oven, crack the door, and let it cool in there for an hour. Then, remove it, cool completely on a rack, and pop it in the fridge for at least 4 hours, or even better, overnight. This chilling is crucial for a perfect, sliceable cheesecake!
Whipping Up the Cream Cheese Frosting
Time for the crown jewel – that irresistible cream cheese frosting! In a big bowl, beat your softened butter and cream cheese together until they’re light, fluffy, and perfectly smooth. This might take a few minutes, but it’s worth it! Now, gradually add the powdered sugar, one cup at a time, beating after each addition until it’s all smooth. Stir in your alcohol-free vanilla extract and then add milk or heavy cream, a tablespoon at a time, until you get that wonderfully spreadable consistency. You want it fluffy but firm enough to hold its shape!
Assembling Your Red Velvet Cheesecake Cake Masterpiece
Okay, it’s assembly time for your Red Velvet Cheesecake Cake! This is my favorite part because you really see it all come together. Place one cooled red velvet cake layer on your serving plate. Spread a nice, thin layer of that glorious cream cheese frosting on top. Then, carefully, oh so carefully, place your chilled cheesecake layer right on top of that frosting. Now, gently set the second red velvet cake layer on top of the cheesecake. Finally, frost the entire cake generously with the remaining cream cheese frosting. Don’t be shy! Once it’s all frosted, pop it back in the fridge for at least an hour to let those layers firm up. Trust me, it makes for much cleaner slices!
Tips for Red Velvet Cheesecake Cake Success
Baking this Red Velvet Cheesecake Cake is super rewarding, but a few little tricks can make all the difference between a good cake and an absolutely *epic* cake! I’ve learned these gems over countless batches, and they’ll help you avoid common pitfalls. Trust me, paying attention to these details will ensure your cake is moist, creamy, and holds together perfectly, making you look like a total pro!
Mastering Your Red Velvet Cheesecake Cake
First off, room temperature ingredients are non-negotiable for both the cake and the frosting – it helps everything emulsify beautifully. When mixing the red velvet batter, mix *just* until combined; overmixing develops gluten and can lead to a tough cake. For the cheesecake, remember that slow cool-down in the oven. It prevents cracks and keeps it wonderfully creamy. You’ve got this!
Red Velvet Cheesecake Cake: Storage and Serving Suggestions
You’ve put all that love into making this incredible Red Velvet Cheesecake Cake, so let’s make sure it stays amazing! This cake is a showstopper on its own, but a little garnish can really make it pop. Think a sprinkle of red velvet cake crumbs, a few fresh raspberries, or even some delicate chocolate shavings for an extra touch of elegance. And when it comes to leftovers (if there are any!), I’ve got you covered.
Keeping Your Red Velvet Cheesecake Cake Fresh
Because of the cream cheese in both the cheesecake layer and the frosting, this beauty absolutely needs to be refrigerated. Store any leftover Red Velvet Cheesecake Cake in an airtight container in the fridge for up to 3-4 days. It actually tastes even better the next day as the flavors meld!
Common Questions About Red Velvet Cheesecake Cake
I know you probably have a few questions swirling around in your head, especially if this is your first time making a Red Velvet Cheesecake Cake! Don’t worry, I’ve heard them all, and I’m here to spill all the secrets and clear up any confusion. Baking should be fun, not stressful, so let’s get these common queries answered so you can bake with confidence!
Can I make Red Velvet Cheesecake Cake ahead of time?
Absolutely, yes! This Red Velvet Cheesecake Cake is actually fantastic when made a day in advance. The flavors get a chance to really meld, and the cheesecake layer sets up beautifully, making it easier to slice. It’s perfect for entertaining!
Why did my Red Velvet Cheesecake Cake crack?
Ah, the dreaded cheesecake crack! This usually happens if your cheesecake cools too quickly. Remember my tip about leaving it in the oven with the door ajar? That slow, gradual cooling is key. Also, sometimes overbaking or too much beating of the eggs can contribute, but usually, it’s about temperature shock!
What can I use instead of red food coloring in Red Velvet Cheesecake Cake?
If you’re not keen on artificial food coloring, I totally get it! You can try using beet powder or even a good quality red beet juice concentrate. It might not give you that super vibrant, fire-engine red, but you’ll still get a lovely reddish-brown hue and the same amazing flavor in your Red Velvet Cheesecake Cake!
Estimated Nutritional Information for Red Velvet Cheesecake Cake
Okay, for those of you who like to keep an eye on what you’re eating (or just curious!), I’ve got some estimated nutritional info for a slice of this Red Velvet Cheesecake Cake. Now, remember, this is an estimate, because homemade recipes can vary depending on exact ingredient brands and portion sizes. But it gives you a good ballpark idea of what you’re getting with this decadent treat!
Share Your Red Velvet Cheesecake Cake Creations
Alright, my fellow bakers, now it’s YOUR turn! I absolutely *love* seeing your kitchen adventures. So, once you’ve whipped up this amazing Red Velvet Cheesecake Cake, please come back and tell me all about it in the comments below! Did you add a special garnish? What did your family think? Don’t forget to snap a picture and tag me on social media – I can’t wait to see your beautiful creations! And if you loved it, a five-star rating would make my day!
PrintRed Velvet Cheesecake Cake
This Red Velvet Cheesecake Cake combines two classic desserts into one decadent treat. A moist red velvet cake forms the base, topped with a creamy cheesecake layer and finished with a rich cream cheese frosting.
- Prep Time: 45 minutes
- Cook Time: 1 hour 30 minutes
- Total Time: 7 hours 15 minutes
- Yield: 12-16 servings 1x
- Category: Dessert
- Method: Baking
- Cuisine: American
- Diet: Vegetarian
Ingredients
- 2 1/2 cups all-purpose flour
- 1 1/2 cups granulated sugar
- 1 teaspoon baking soda
- 1 teaspoon salt
- 1 teaspoon cocoa powder
- 1 cup buttermilk
- 1 cup vegetable oil
- 2 large eggs
- 1 tablespoon red food coloring
- 1 teaspoon white vinegar
- 1 teaspoon vanilla extract
- 24 ounces cream cheese, softened
- 1 cup granulated sugar
- 3 large eggs
- 1 teaspoon vanilla extract
- 1 cup (2 sticks) unsalted butter, softened
- 8 ounces cream cheese, softened
- 4 cups powdered sugar
- 1 teaspoon vanilla extract
- 2–3 tablespoons milk or heavy cream
Instructions
- Preheat oven to 350°F (175°C). Grease and flour two 9-inch round cake pans.
- For the red velvet cake: In a large bowl, whisk together flour, sugar, baking soda, salt, and cocoa powder.
- In a separate bowl, combine buttermilk, vegetable oil, eggs, red food coloring, vinegar, and vanilla extract.
- Pour the wet ingredients into the dry ingredients and mix until just combined. Do not overmix.
- Divide the batter evenly between the prepared cake pans. Bake for 25-30 minutes, or until a wooden skewer inserted into the center comes out clean.
- Let the cakes cool in the pans for 10 minutes, then invert onto a wire rack to cool completely.
- For the cheesecake layer: Reduce oven temperature to 325°F (160°C).
- In a large bowl, beat softened cream cheese and sugar until smooth.
- Beat in eggs one at a time, then stir in vanilla extract.
- Pour the cheesecake mixture into a greased 9-inch springform pan.
- Bake for 45-55 minutes, or until the edges are set but the center still jiggles slightly.
- Turn off the oven and let the cheesecake cool in the oven with the door slightly ajar for 1 hour.
- Remove from oven and cool completely on a wire rack. Refrigerate for at least 4 hours, or preferably overnight.
- For the cream cheese frosting: In a large bowl, beat softened butter and cream cheese until smooth and creamy.
- Gradually add powdered sugar, one cup at a time, beating until smooth.
- Stir in vanilla extract and milk or heavy cream until the frosting reaches a spreadable consistency.
- To assemble: Place one red velvet cake layer on a serving plate. Spread a thin layer of cream cheese frosting on top.
- Carefully place the chilled cheesecake layer on top of the frosting.
- Top with the second red velvet cake layer.
- Frost the entire cake with the remaining cream cheese frosting.
- Refrigerate for at least 1 hour before serving to allow the layers to set.
Notes
- Ensure all dairy ingredients are at room temperature for a smooth batter and frosting.
- Do not open the oven door too early when baking the cheesecake to prevent cracking.
- For best results, chill the cheesecake overnight.
- Leftover cake can be stored in an airtight container in the refrigerator for up to 3-4 days.
Nutrition
- Serving Size: 1 slice
- Calories: 750
- Sugar: 70g
- Sodium: 450mg
- Fat: 45g
- Saturated Fat: 25g
- Unsaturated Fat: 15g
- Trans Fat: 0g
- Carbohydrates: 80g
- Fiber: 2g
- Protein: 8g
- Cholesterol: 150mg


